Broccoli and cheese soup from Panera Bread has always been one of my favorite meals, so of course I had to figure out how to make it on my own! This recipe is easy peesy if you have the right ingredients. I typically don’t like to measure things and go with a glug of this and a pinch of that, but I’ll share my estimates as best I can. As always, I recommend you play around with the ingredients to suit your taste.
Broccoli and Cheese Soup
Ingredients
1 medium onion
3-4 pods of garlic
2 Tablespoons of butter or olive oil
2 Tablespoons of flour
Bone broth – 2 quarts (homemade bone broth or store brand – I recommend organic and whatever brand has the highest protein and fat content)
Broccoli – 3 to 4 medium crowns
*Celery and carrots optional
Heavy whipping cream – 1 cup
Whole milk – 1 cup
Shredded cheese – 8 oz
Salt and pepper to taste
*Cayenne pepper sprinkled on top optional if you like the spice
Directions
First of all, sauté 1 medium onion and 3-4 garlic (3-4 pods) in a generous amount of butter or olive oil (about 2 Tablespoons).
Sauteed Onions and Garlic for Broccoli and Cheese Soup
Next, add 2 Tablespoons of flour and stir continuously on medium heat to create the roux.
Adding the Flour to Make a Roux for Broccoli and Cheese Soup
Steam broccoli before putting it in the blender along with any additional vegetables like carrots and celery. Using a steamer like this, turn the heat up to high until the water boils, then turn it down and simmer for just a few minutes keeping the texture still somewhat firm.
Steamed Broccoli for Broccoli and Cheese Soup
Steamed Carrots and Celery for Broccoli and Cheese Soup
Blend about 3/4 very well and the remaining 1/4 at a course level so you can still see some vegetable chunks. Add some type of liquid (broth, milk, or heavy whipping cream) to help with the blending. (If you have picky eaters who don’t like onions, you can blend the sautéed onions and garlic and no one will be the wiser!)a
I like to make my own bone broth with every chicken that I cook, so I always have bone broth in the freezer. To thaw it out I put it in a pot of warm – hot water for a couple of hours. I like to add all of my ingredients first and then add the broth so that everything evens out. If there’s any extra broth, I put it aside in some tupperware to replenish the soup as we eat it or I’ll use it to make a quick bowl of egg drop soup.
Bone Broth for Broccoli and Cheese Soup
Add milk, cream, and shredded cheese at a low to medium setting stirring continuously so that it doesn’t stick to the bottom. Turn the heat off once the cheese has melted and let sit for about 20-30 minutes to let the flavors soak in.
Add salt and pepper, give it a taste, maybe add a little more…but remember that you can always add more but never less. 😉
In Conclusion
There are many different variations you can choose based on personal preference. For example, you might like to play around with different cheeses like Monterey Jack or Havarti which would give it an even creamier texture. Shredded or diced chicken can also be added to make this a heartier meal. Milk, half and half, and heavy whipping cream can also be interchanged depending on your preference. I’m a big believer of tasting things along the way to get just the flavor I’m looking for, so have some fun with this recipe!
This is just your basic chicken soup recipe, but when each component is carefully prepared from the roasting of the chicken, to the making of the stock, to the preparation and addition of other ingredients like the soaked barley, it is truly a masterpiece. I like to make some sort of soup every other week or so (especially during the cold months) because it makes a great “go to” lunch, dinner, breakfast, or snack. Whenever I am too busy to prepare a meal or feel hungry and tempted to eat a pile of cookies or go to McDonalds, I just put my soup on the stove and minutes later I have a nice, delicious, healthy, and nourishing meal.
Optional: I like to add variety to my soup, so sometimes I’ll add a few garlic cloves, 1 cup chopped leeks, 1 cup chopped bok choy, and/or whatever else is leftover in my fridge that could be chopped up and sounds like it would be good in soup like zucchini, broccoli, parsley, or green beans.
Directions
Bake the chicken. Check out my roasted chicken recipe here, but basically, you’re going to season your 4-5 pound chicken (I use garlic powder, onion powder, oregano, basil, salt, pepper, and throw a stick of butter in the cavity) and bake at 350° F for 1.5 hours.
Roast Chicken
Cut it up. Let the chicken cool, cut it off the bone, and leave to soak in its own juices.
Make your bone broth. Read more about making bone broth here, but basically, you’re going to low boil your bones, skin, etc. with cold filtered water and a dash of apple cider vinegar (to draw out the minerals) for 24-36 hours (or at least overnight). Then, drain the broth and use it for your stock. I like using a large 7 quart pot for making my broth so that I can use half for my soup and freeze the other half for later use.
Straining the Bone Broth
*Pre-cook the veggies. This is an optional step because you can certainly just cook the veggies in the soup, but it adds a TON of flavor. In a large wok, melt some butter then add minced garlic and diced onion, then add whatever vegetables you are using. Season with a bit of Bragg Liquid Aminos, Real Salt, pepper, garlic powder, onion powder, oregano powder, and basil powder and cook (covered and stirring often) until wilted but still firm (about 8 minutes).
Add the veggies and chicken, then pour the broth over. By adding the veggies and chicken first, you ensure that you don’t add too much broth!
Chicken Soup with Carrots, Celery, Bok Choy, and Leeks
Add your starch. If you’re trying to eliminate starches, you don’t have to add them, but I think it makes the soup taste more complete. If you’re going to soak your barley (which gets rid of phytic acid), make sure you do it properly, especially by rinsing and draining it enough (otherwise your soup will be really cloudy). If you’re in a hurry, you can just go with some quick barley. Barley is the healthiest option, but to mix it up, I like to either add beans (like butter beans and garbanzo beans) or some basmati rice (which has the least amount of arsenic and no phytic acid).
Chicken Soup Over Rice
Bring to a low boil. If all of your ingredients are pre-cooked, you’ll just want to bring it to a slow boil (keep it at about a 3-4, low-medium heat) until it boils, then turn it off and leave it covered. If you need to cook your veggies, turn it down to a rolling boil (keep at about a 3) for about 10 minutes or until the veggies are soft but still firm and the starch is tender.
Salt and pepper to taste. I like to wait until all of the flavors have had a chance to simmer together before adding my salt and pepper. Then, I’ll add a bit at a time, stir, taste, and repeat until the flavor is just right!
Enjoy! When everything is just right, get out your bowls and enjoy some soup! It’s also really good to serve some piping hot sourdough muffins with this meal.
Chicken Soup with Carrots, Celery, Bok Choy, and Leeks
In Conclusion
Chicken soup make with organic, pasture raised chickens using properly prepared broth and grains is just about one of the healthiest meals you can eat. I love making a pot whether it’s summer or winter for a nourishing go to meal that can last my family through the week. Read more of my soup recipes here or my chicken recipes here.
Making a good chicken bone broth (or chicken stock as it is also called) is one of the simplest and most nourishing things you can make. You can use it immediately to make some chicken soup, put it in a Ziploc bag and freeze it to use later, freeze it in ice cube trays to have little bursts of “bullion” to use whenever you need it, or you can simply sip a nice hot mug of it instead of coffee or as a snack/meal replacement.
I love making soup of any kind because it provides a nice complete meal that can feed my family at a moment’s notice for the week, but I especially like making any kind of soup with chicken bone broth because it is pretty much the most healing and most nutritious food there is.
Chicken bone broth is easy to both digest and metabolize (two things that are very different yet people think are the same…I’ll be exploring this in more depth at a later time). This makes it perfect the perfect food when you are trying to heal from any chronic illness or are sick with the flu or the common cold.
During digestion, the gelatin found in bone broth is a hydrophilic colloid that attracts and holds liquids, including digestive juices, which helps to support proper digestion. In her book, Nourishing Traditions, Sally Fallon also states that chicken soup,
“Has a natural ingredient which feeds, repairs and calms the mucous lining in the small intestine. This inner lining is the beginning or ending of the nervous system. It is easily pulled away from the intestine through too many laxatives, too many additives…and parasites.”
Chicken broth also contains valuable minerals including calcium, magnesium, phosphorus, silicon, sulfur chondroitin, glucosamine, and a variety of trace minerals that are in a form your body can easily absorb. When your body is healing, you NEED these nutrients from nutrient dense food to heal.
Another cool thing about bone broth is that because of the anti-inflammatory acids such as arginine, it helps to inhibit infection caused by cold and flu viruses. In her article, Broth is Beautiful, Sally Fallon explains,
“Science validates what our grandmothers knew. Rich homemade chicken broths help cure colds. Stock contains minerals in a form the body can absorb easily—not just calcium but also magnesium, phosphorus, silicon, sulphur and trace minerals. It contains the broken down material from cartilage and tendons–stuff like chondroitin sulphates and glucosamine, now sold as expensive supplements for arthritis and joint pain.”
My Recipe
Ok, so are you ready to make some broth? For such a simple meal, there sure are a lot of different recipes for bone broth. With four young children underfoot, I like to cook food that’s as nutritious as possible as simply as possible. This is why I don’t add anything (except apple cider vinegar, which helps to draw out the minerals) to my bone broth. You can surely get creative and add whatever you’d like, but if you’re looking for simple, you’ve come to the right place!
Ingredients
1 4-5 pound whole roasted chicken(Preferably organic and pastured, the stock will not gel properly with a battery-raised chicken.)
1 tablespoon Apple Cider Vinegar(This pulls the minerals, especially calcium, out of the chicken bones.)
*Optional: Carrot tops and pieces, celery stalks and leaves, onion skins and onion, parsley, and salt (I usually don’t add any of these ingredients except the salt, and I wait to add that at then end so that I can salt it to my taste preference. If you’re going to add parsley, wait until the very end.)
Advanced: Chicken feet(Provides a more gelatinous broth.)
Directions
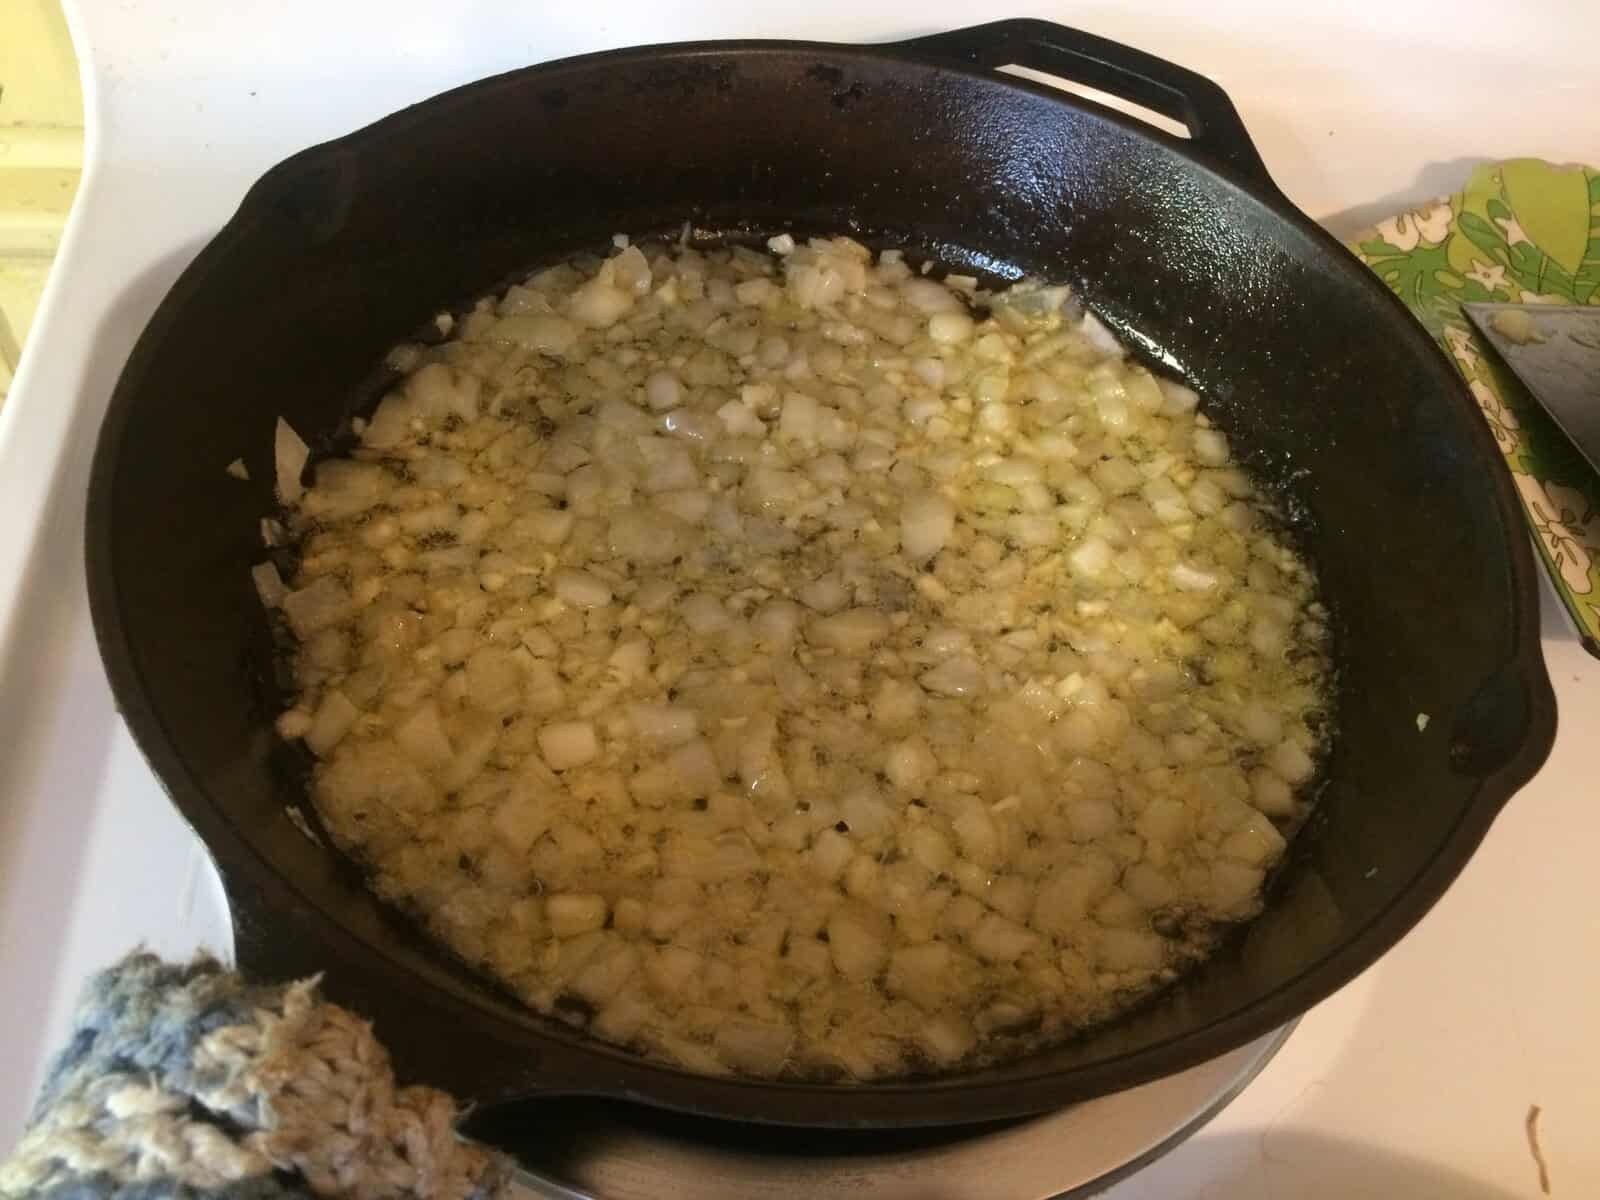
Roast your chicken. You can read more about my roasted chicken here, but basically, I stuff mine with a stick of butter and season with salt, pepper, onion powder, garlic powder, oregano powder, basil powder, and bake at 350° F for 1.5 hours.
Roast Chicken
Pick off the meat. I like to cut my breasts into cubes before cutting off the bone. Then I methodically pick off all usable pieces of meat, cut into bite size pieces, leave all pieces to soak in the remaining chicken juice, cover, and store in the refrigerator until the next day.
Pick the Meat Off the Bones
Save all skin, bones, and other parts. I do typically discard the giblets (unless my cats want to eat them), but other than that, every last little scrap goes into my pot including the carcass, bones, skin, and any other little tidbits. I also like to leave just a titch of meat on the bones for extra flavor.
Save ALL of Your Chicken Scraps
Cover with water. After filling the pot with your chicken scraps, fill to just about the brim with cold filtered water.
Chicken Bits Covered with Water
Add the apple cider vinegar. You have to be careful that you don’t add too much or you will really taste it. You might want to start with just a teaspoon and adjust to taste. Even though 2 tablespoons would be most effective, I usually only add about a teaspoon because that’s the flavor I like.
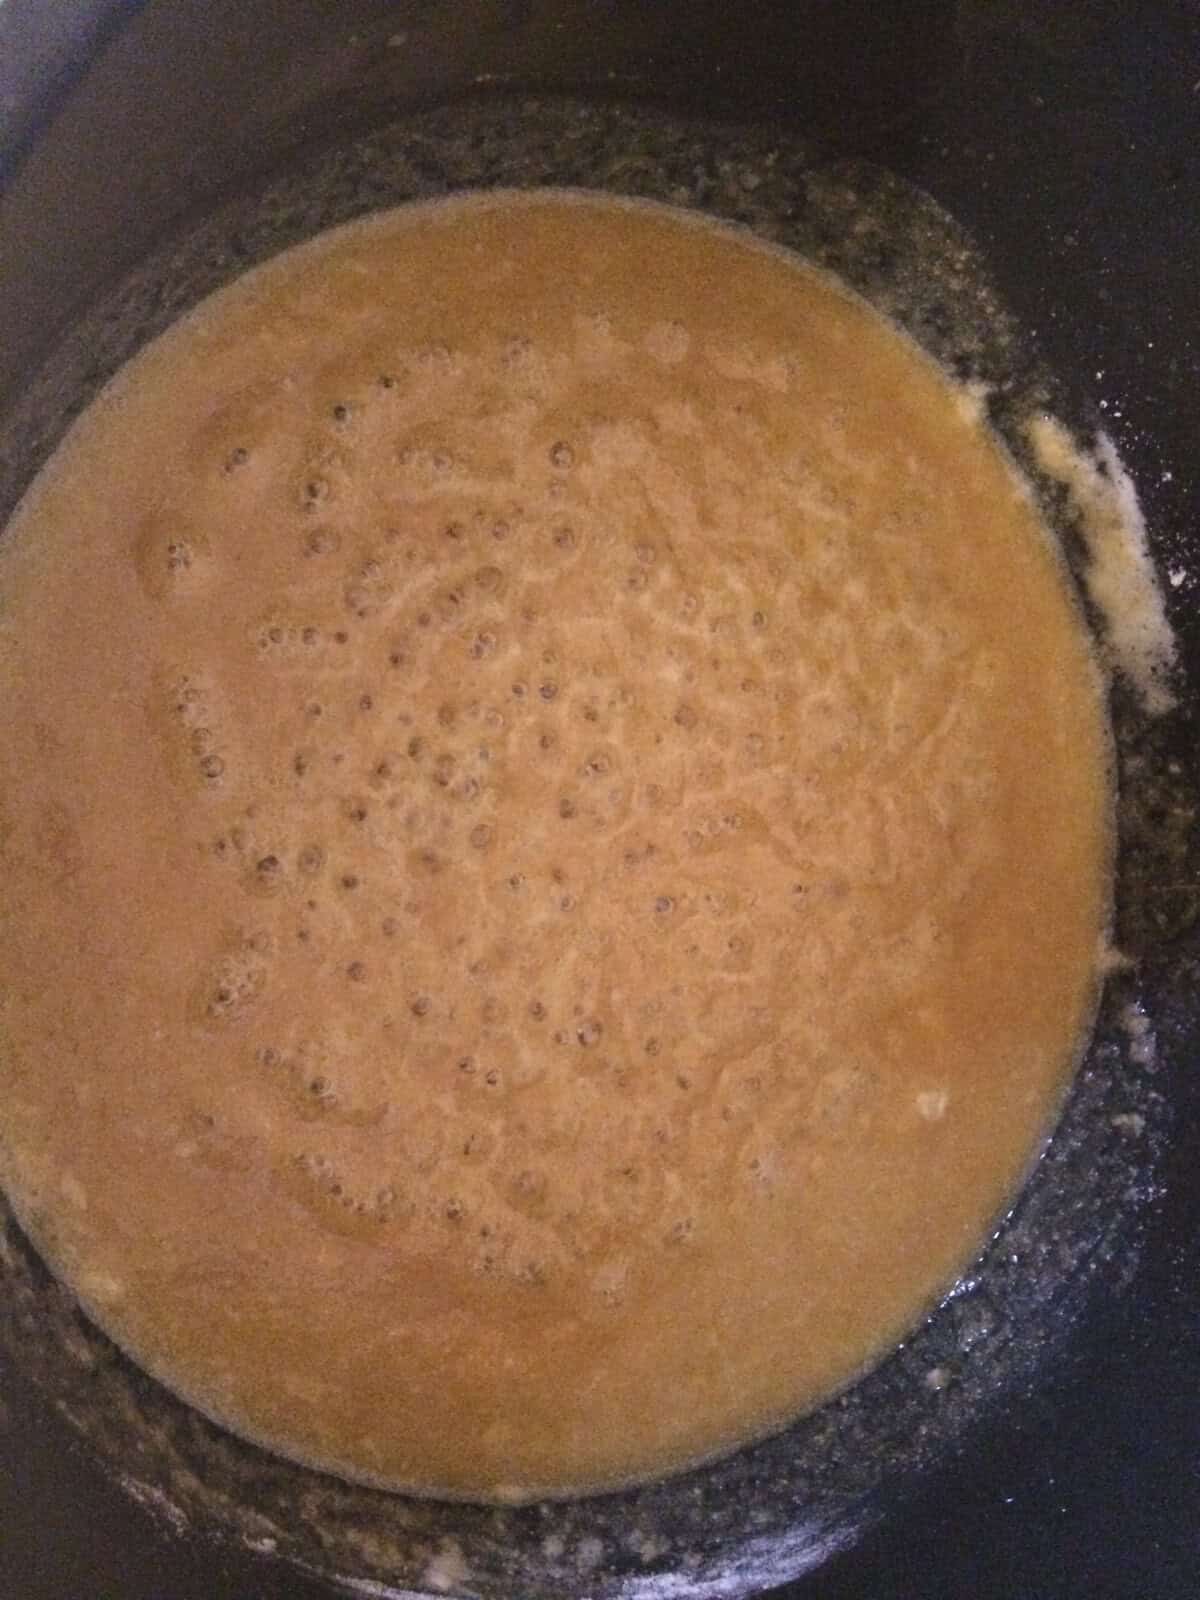
Slow boil. Bring the water to a slow boil and skim any scum that comes to the top. (These are impurities.)
Cover and simmer. Cover and reduce to a low rolling boil. (On my stove, this usually hovers around a 2 or 3.) Ideally, you’ll want it to simmer for a good 24-36 hours for the maximum benefit, but at the very least, just let it simmer overnight.
Bone Broth Cooling
Cool and strain. Turn off the burner, let it cool, then strain into a separate bowl through a colander. You’ll notice that the bones will be soft and break apart easily. *Do not feed them to any animals, it will tear up their insides.
Straining the Broth
Enjoy! Time to put your broth to use.
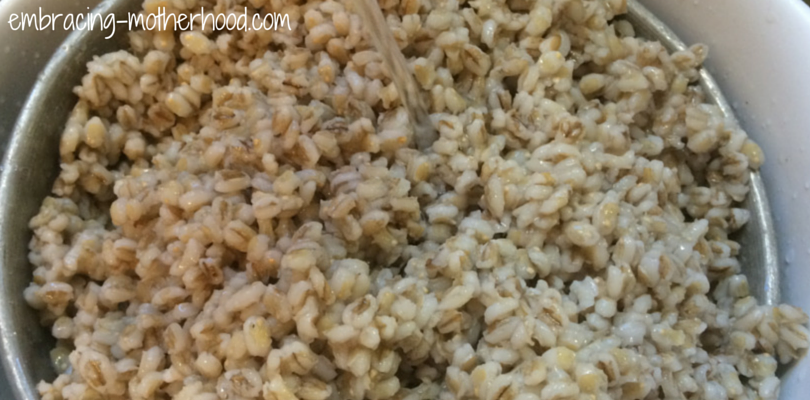
Chicken Soup: Add some chicken, celery, carrots, and soaked barely to make a simple chicken soup.
Chicken Soup
Egg Drop Soup: Bring it to a boil, add some Bragg Liquid Aminos, Sriracha, and eggs to make an egg drop soup to die for.
Egg Drop Soup
Store in the Freezer: Store your stock in Ziploc bags in the freezer. (Just be sure to lay them flat instead of plopping them on a rack where they will freeze while seeping through the cracks and then rip open when you try to take it out later….um, personal experience!)
Freeze into Cubes: Freeze in ice cube trays to save for smaller size portions to use instead of those MSG laden “bullion cubes”.
Sip It: Pour into a mug to sip on. Sometimes, I like adding some Bragg Liquid Aminos and Sriracha for a spicy oriental flavor!
Bone Broth in a Mug
In Conclusion
If there is one food that you could add to your family’s meal plan that would make the most difference, I would say that bone broth is in the top ten for sure! If you’re not much of a cook, don’t worry! You can hardly get this recipe wrong! If you are, there are certainly a lot of variations you could try to make this a gourmet dish. As we enter another cold winter season full of viruses, I’m sure that I’ll be finding ways to incorporate this bone broth into our diets on a regular basis.
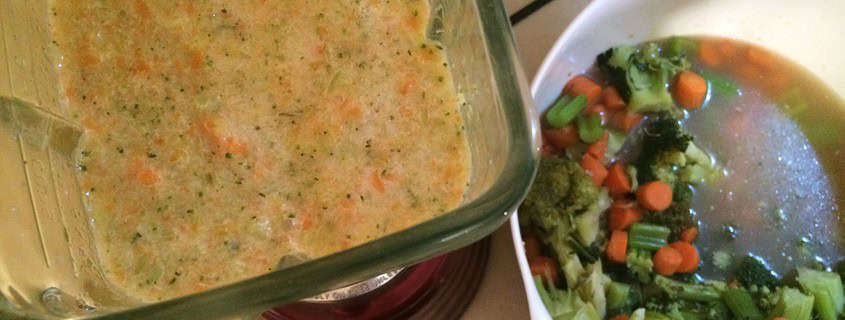
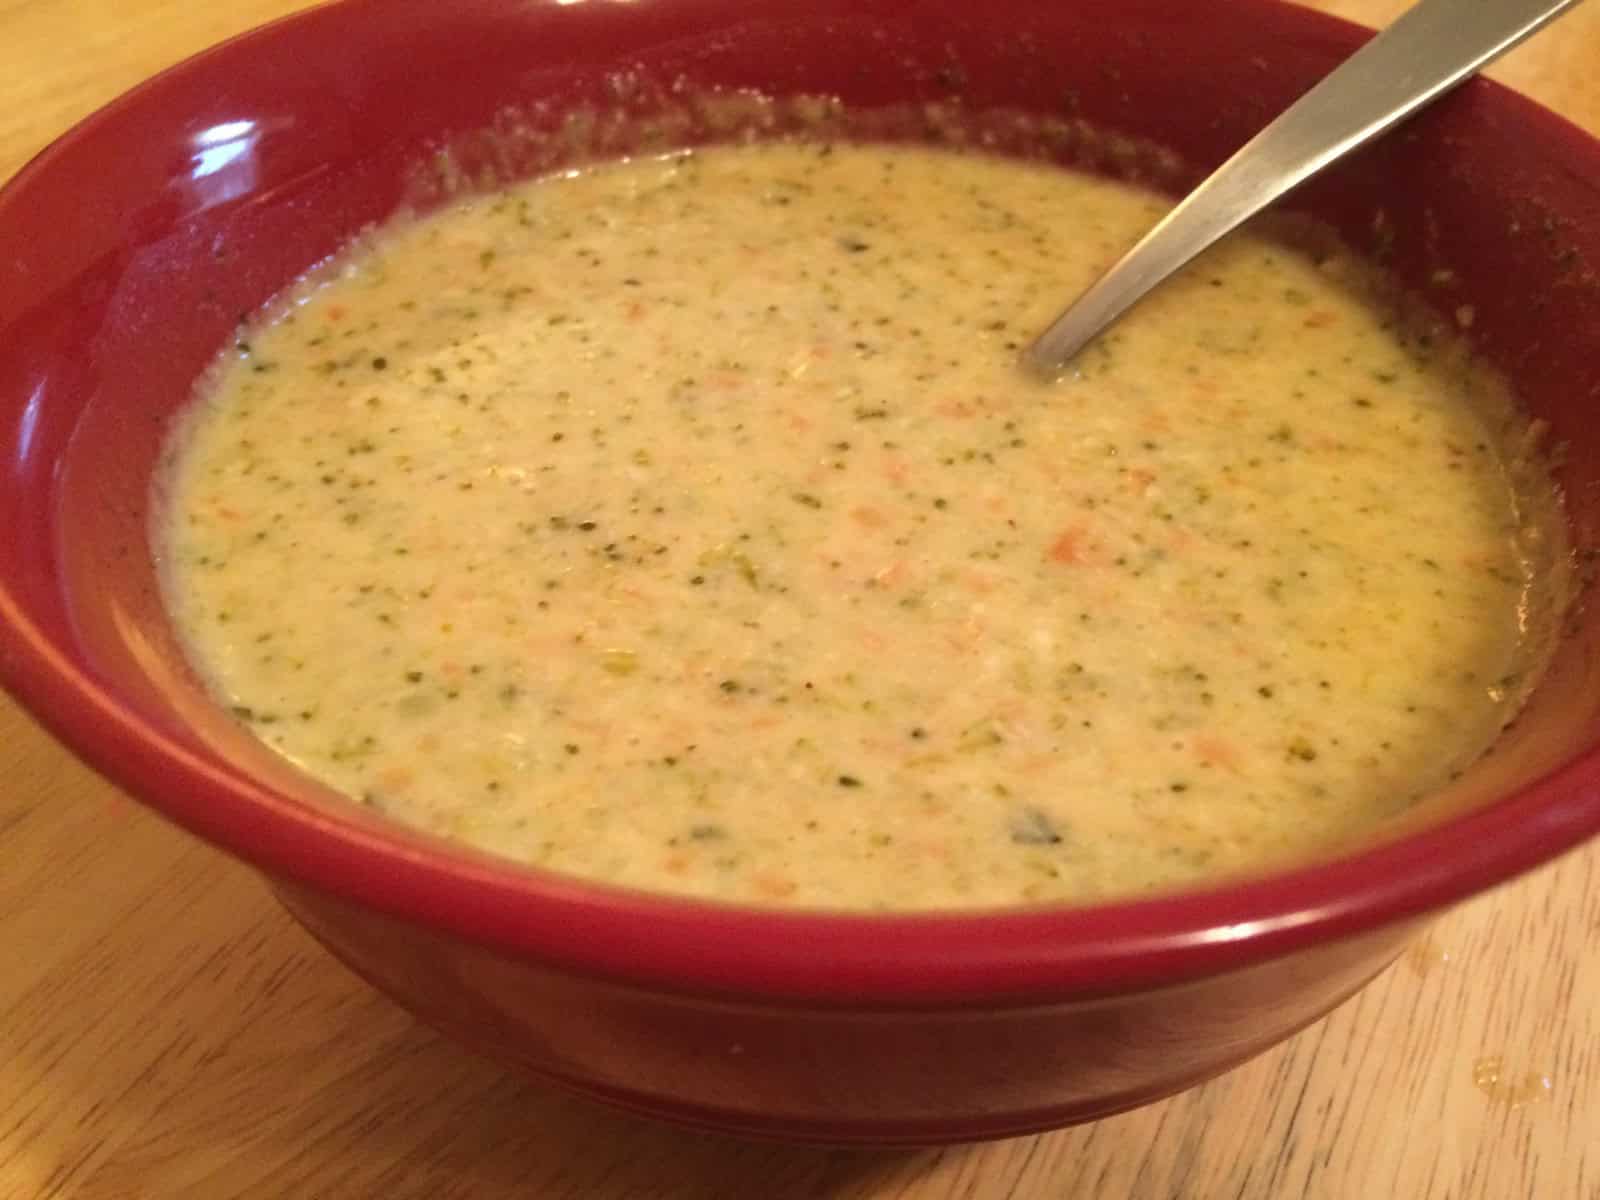
See more ideas for what to make with this broth in my soup section.
https://embracing-motherhood.com/wp-content/uploads/2016/08/bone-broth.png400810Stacey Maaserhttps://embracing-motherhood.com/wp-content/uploads/2018/01/EM_Logo.pngStacey Maaser2016-08-23 10:10:262020-11-20 14:44:52How to Make a Nourishing Chicken Bone Broth
I love, love, LOVE broccoli and cheese soup, especially the Panera Bread style of broccoli and cheese soup that is all puréed and creamy. Since I’m not going to run out to Panera Bread every time that I want some of this delicious soup, I decided to make my own. I searched the Internet for copycat recipes and compiled my favorite parts into this recipe which includes all of the wholesome ingredients I love cooking with such as bone broth, raw milk, and organic vegetables!
Ingredients
2 c. Chicken Stock (I always like making extra and keeping some in the freezer, but you might need to roast a chicken to make some fresh. If you do this, you could even purée some chicken to throw into the mix to make it an even heartier soup.)
Frozen Chicken Stock
2 c. Raw Milk(I like letting the cream rise to the top and using that mostly, or I’ll get some organic half and half from the store.)
¼ c. Flour (I like mine freshly ground.)
1 Stick of Butter (½ c.) plus 2 T. (to sauté the onions)
2½ c. Shredded Cheese (I like Colby Jack)
1 Onion
3 Pods of Garlic
2 Head of Broccoli (Or you can substitute with 2 c. of other vegetables such as carrots and celery.)
Directions
Sauté the 2 T. of butter with the garlic and onion. I like peeling the garlic (crush with the side of your knife first for easy peeling) and mincing it with a knife or my handy dandy hand chopper (if I feel like cleaning it). You’ll be puréeing all of this later, so don’t worry about chopping it up super fine. Cook at a low to medium heat until the onions are translucent, about 4-5 minutes. Set aside until later. (I put mine in a little bowl because I always need my cast iron skillet available!)
Sautéd Onions and Garlic
Steam all of the vegetables. By steaming the vegetables first, it will make them a lot easier to blend later! (*Note: When making this recipe, my sister skipped this steaming step by using her food processor to chop up all of the vegetables raw. She said it turned out great!) Coarsely chop up the broccoli (and the carrots and celery if you’ll be using them) and steam. Check out my tips and tricks for perfectly steamed broccoli here! Put in a big bowl to cool. *My steamer isn’t very big and I made a double recipe, so it took two batches of broccoli and one batch of carrots and celery to get the job done.
Steamed Broccoli
Steamed Carrots and Celery
Make the roux. Melt the stick of butter in your soup pot. Once it’s melted, add the flour and stir. Cook at low to medium heat (nice and bubbly) and continue stirring for about 3-4 minutes.
Roux
Add the milk. Add slowly, stir often, and keep at a low to medium heat.
Purée the vegetables with the chicken stock. While the milk is heating up, add small batches of steamed vegetables into the blender. I like blending my onions (that we set aside from earlier) too. Top off the blender with the chicken stock to make it blend easier. Add to the soup pot.
Steamed Broccoli, Carrots, and Celery with Chicken Stock
Turn the blender off and on repeatedly so that it is puréed, but blended as little as possible if you’re like me and want there to be a few little chunks in there to chew on!
Pulse on Low
Add the cheese. Wait until the soup is good and hot before you add the cheese. You want it to melt right away.
Cook for 20 minutes. Cook on a low to medium heat and continue to stir often. If it starts to bubble, turn the heat down a little bit. Let cool and serve. I find that this soup tastes better the longer it sits. This gives everything a chance to thicken and the flavors to really soak in.
https://embracing-motherhood.com/wp-content/uploads/2015/12/broccoli-and-cheese-soup.png400810Stacey Maaserhttps://embracing-motherhood.com/wp-content/uploads/2018/01/EM_Logo.pngStacey Maaser2015-12-08 12:23:492020-11-20 15:43:17How to Make Panera Bread Style Broccoli and Cheese Soup
As we approach colder days and sicker days (The two always go hand in hand don’t they?), I love making a nourishing chicken bone broth and using it in as many different recipes as I can. I was looking for something different than my standard chicken soup recipe and came across this. Here is my version. I love this soup so much that I want to eat it (or drink it) for every meal! It’s also really great if you’re trying to do a low carb or keto diet.
Boil some chicken bones and get yourself some bone broth. If you roast and boil and entire chicken, it will make way more than 6 cups, but this recipe is best to eat right away. So I recommend saving the rest of the broth to make more egg drop soup later, turn it into a standard chicken soup, or freeze it for later.
Bone Broth
Add the Bragg Liquid Aminos, Sriracha, salt, and pepper. *With the salt and pepper, I just add it to my taste preference.
Bring the broth to a slow rolling boil. (Set the dial to about a 6, stir occasionally until it boils, then turn it down to a 3 and let it continue to boil.)
Mix the cornstarch into a cup of water (so it won’t be clumpy) and add to the boiling water. (You can add a little bit to the eggs to make them creamier too.)
Beat the two eggs, add a bit of salt and pepper, and slowly drizzle into the boiling water.
Turn off the heat, let it cool a bit, and serve right away! Sprinkle some scallions on top for a nice little touch or add some chicken to make this more of a meal. I like pouring mine into a mug and just sipping on it!
When I used to work at The B.O.B., Bobarino’s made the best white chicken chili ever, and I would eat a bowl every single day for my shift meal. It was my all time favorite food, and when I ventured off into the world of teaching, and then a job as a full time stay at home mom, I finally figured how to make a similar chili that was even better than the white chicken chili that I used to love so much.
I mean, this chili is so good that I would say it is the single best thing that I have ever learned how to cook. The secret to the amazing flavor of this soup is in both the quality of each of the ingredients and in following this recipe precisely each step of the way so that each component of the soup is properly prepared. Making a good soup like this is NOT about just throwing all of the ingredients into a pot. Each flavor must be layered upon each other, and the end result is a dish so exquisite that you will either want to share it with everyone to impress them, or horde it for yourself so that you can enjoy all of the succulent flavors by your lonesome.
4 c. Chicken Stock(See how to make it here, or you can buy some, preferably organic. I always try to make extra and store it in the freezer in Ziploc bags.)
2 c. Shredded Monterrey Jack Cheese(You can really use any kind of cheese. I used a combination of mozerella and sharp cheddar last time I made this because that was all I had and it turned out great.)
1 c. Sour Cream(Get a good brand like Daisy that doesn’t list a ton of extra ingredients.)
Chili Powder
Braggs Liquid Aminos
Real Salt
Onion Powder
Cumin
Cayenne Pepper(Add a bit if you like a little spice.)
*Green Onion
*Jalapeño
*Tortilla Chips
*For toppings
Directions
Prepare the Beans: In a pinch, you can use canned beans from the store, but I buy dry organic garbanzo beans in bulk, and to get rid of the phytic acid, I need to prepare them properly. To do this, I put my beans in a large pot, cover them with twice as much water, and add a glug of apple cider vinegar and a spoonful of freshly ground whole wheat flour that helps to unlock the phytase that will break down the phytic acid. Then, I turn my pot on low and let them sit overnight. In the morning, I bring them to a boil, skim the scum, turn the heat back down to low, and cover and simmer for the entire day (or 8 hours). The longer you can do this (24-36 hours), the better, but anything is better than nothing. 🙂
Skim the Scum from the Beans
Cooked Garbanzo Beans
Season the Chicken: Put the chicken into a bowl and add 2 t. Bragg’s Liquid Aminos, 2 t. Real Salt, 2 t. Chili Powder, 1 t. Cumin, 1 t. Onion Powder, and a bit of pepper. *I hate adding amounts for my seasonings, because I never measure them when I cook, I just eyeball it, but you can use my numbers to get you started. You can cook the chicken right after you season it, or you can put it in a ziploc bag or cover up the bowl and let it marinate in the fridge overnight (recommended).
Cook the Chicken: If I can, I like to cook my chicken on the grill, but you can also pan fry it as well.
Grilled Chicken: Preheat and scrape the grill. Grill on medium heat for about 15 minutes on each side or until the internal temperature is between 160º-180º F.
Grilled Chicken
Pan Fried Chicken: Preheat a generous amount of butter or coconut oil in your pan (preferably a cast iron skillet). Cook on medium heat with a cover for 15 minutes, flip, and cook on the other side for an additional 15 minutes.
Cut the Chicken: When I had more time, I used to like to shred my chicken with my fingers into irregular chunks, but in an effort to save time, I just cut my cooked chicken into cubes, and I like it just fine this way. Make sure you’ve given the chicken a chance to fully cool before cutting it. This will ensure that all of the juices are soaked up. Add more of the same seasonings to the cut up chicken and put back into the fridge to let the flavors soak in (recommended), or you can use it right away.
Make the Roux: Melt one stick of butter in a large soup pot. When it’s melted and a little bubbly, add the flour and stir constantly for about 3 minutes.
Add the Onion: If you pan fry your chicken, you can cook the onion in the same juices until it’s soft, but if you’ve grilled your chicken, you can just add the chopped onion to the roux.
Add the Liquid: Add the chicken stock and the cream and slowly bring to a boil stirring often. After it comes to a boil, turn it down to a lower temperature to let it simmer.
Roux with Cream, Chicken Stock, and Onion
Add the Rest: Add the beans, chicken, green chilies, cheese, and sour cream.
Season the Soup: Add 4 t. chili powder, 2 t.cumin, 1 T Real Salt, and ½ t. cayenne pepper. Simmer everything for about 20 minutes. *I hate giving amounts for the seasonings because I like to just add to taste. I recommend that you taste often as you add your spices to adjust the amounts to your liking.
White Chicken Chili
Serve: Serve each bowl with a dollop of sour cream and top with green onions and jalapeños (if you like spice). Serve with tortilla chips too. *I’m not usually one to stage my food before I serve it, but this chili tastes REALLY good with the toppings put on precisely like this.
On a cold winter night, or a hot summer day, this soup is good anytime! Filled with fresh, nutrient dense, and delicious ingredients, this soup will help you stay slim, energized, and full. Fresh cabbage is an amazing vegetable filled with beta-carotene, vitamin C, and glucosinolates (that protect against cancer). Fresh tomatoes are also an excellent source of nutrients including potassium and the powerful antioxidant lycopene. So what are you waiting for? Let’s make some soup!
Cabbage, Chicken, and Tomato Soup with Barley Added
Ingredients
1 Head of Cabbage (cabbage is on the “Clean 15” list)
1 Bag of My Tomato Purée (or 2 16 oz. home canned jars, or organic BPA free jars from the store)
2 c. Chopped Celery (or whatever other vegetables you have lying around)
Tomato Purée: Add the tomato purée to a large pot and start to warm it up at a low-medium heat.
Tomato Purée
Add the Vegetables: Cut up the cabbage (shredding it is even better), chop the celery, and really go ahead and chop up any other vegetable you have in your fridge that sounds good like carrots, bok choy, leeks, green onion, etc. and throw them all in the pot.
Add the Meat (or not): Cut up the cooked chicken into bite sized pieces and add it to the pot. Or, if you’re going the ground beef way, add that to the pot. Or, just keep this a vegetarian dish, it will still taste great! (I have actually always used this recipe with ground beef until I just happened to have some extra chicken around, and it was simply amazing!)
Roasted Chicken
Add the Seasonings: If you’re using my tomato purée recipe, you’ll already have most of your seasonings added, but if you’re using unseasoned tomatoes, add the garlic, cilantro, parsley, maybe a little dill, oregano, thyme, sage, or whatever other fresh herbs you might have lying around. Then add salt and pepper to suit your taste.
Chopping Up Some Fresh Herbs
Simmer: Bring all of the ingredients to a slow boil, then turn down the heat to a low 2 or 3, cover, and let everything simmer for about 30 minutes. If I know that I’m going to be eating my soup for many days, I like to cook things really lightly at first so that every time I reheat it, all of the nutrients aren’t lost from over-cooking it.
Cabbage Soup Simmering
Barley: I love adding barley to just about every soup because it’s so healthy and filling, but sometimes it can kind of take over the soup and then no one else wants to eat it but me! So, sometimes I’ll just cook the barley and leave it separate so that anyone who wants can go ahead and add a scoopful. See my recipe for properly preparing organic barley to get rid of the phytic acid here.
Serve the Barley on the Side
Enjoy! This soup is good hot or cold. I really like eating mine with a toasted sourdough muffin with butter on the side.
Barley has a pretty impressive nutrient profile that makes it a wonderful addition to any soup. In one cup, it has 23 g of protein, is high in the vitamins thiamin, riboflavin, niacin, vitamin B6, with some folate, and high in the minerals magnesium, phosphorus, potassium, zinc, copper, manganese, selenium, and some calcium. But unless it is properly prepared by soaking, sprouting, or fermenting, these minerals will not be accessible.
Hulled barley still contains the outer bran layer and pearl barley has this removed. If you’re not going to properly prepare your barely, it might be a better idea to go with the pearl barley. Just know that in addition to having the phytic acid removed, it is also has hardly and protein or nutrients left either. I like to buy my hulled barley in bulk here through Country Life Natural Foods, but you can also buy it here and here from Amazon.
At any rate, the best way to prepare barley so that it gets rid of all the phytic acid is to soak it in an acidic medium that will unlock the phytase within the barley which will help to break down the phytic acid. Read more about phytic acid in my blog Phytic Acid: An Anti-Nutrient That’s Slowly Killing You.
Put your barley in a four quart pot and fill it almost to the top with water. It’s best if the water is warm.
Barley in Water
Add the apple cider vinegar.
Let it sit for 24+ hours. Stir the grains occasionally if you think of it.
Bring to a slow boil and let simmer until the barley puff up. It should soak up most of the water at this point.
Drain the barley in a colander and rinse with filtered water. (This isn’t necessarily getting rid of any impurities, but if you don’t do this, your soup will be really cloudy.)
Straining Barley
Add to your soup and continue to cook on low to medium for about an hour.
As we have entered the deeper stages of our healthy eating conversion, I have always felt guilty about buying the MSG laden packets of taco seasoning, but we just couldn’t live without eating tacos!!! So I tried several different creations before finally creating this amazing recipe. We all love eating it and don’t miss the taco seasoning at all. Best of all, the kids love it! Our son (who can be a picky eater) loves eating a bowl of this meat as a little snack or a whole meal.
Ingredients
1 lb. Ground Beef(Preferably use grass-fed beef. We have also used venison in this recipe and it tastes great!)
1 Medium Onion (or 3 green onions)
3 Cloves of Garlic
3 T. Butter(Pastured butter like Kerrygold is the best, organic butter is the next best, and butter without rBST growth hormones is better than plain butter, and plain butter is WAY better than margarine.)
2 t. Real Salt (I buy my Real Salt in bulk here, you can buy a shaker here, or a refill pouch here.)
2 t. Ground Oregano (I buy mine here or you can buy it here.)
2 t. Ground Basil (I buy mine here or you can buy it here.)
2 t. Garlic Powder (I buy mine here or you can buy it here or here.)
2 t. Onion Powder (I buy mine here or you can buy it here.)
Preheat your cast iron skillet. First, let the pan slowly heat up on a low to medium setting and allow the butter to melt and coat the pan. (Read more about curing your cast iron skillet here.)
Cured Cast Iron Skillet
Sautè the onions and garlic. Chop up the onion, peel the garlic and crush it in a garlic press and add both to the bubbling butter. Cook and stir for about 2 minutes.
Add the ground beef. Break it apart a little bit at a time as it cooks and flip it as each side is browned.
Time for seasonings! Once it is fully browned, add the garlic powder, onion powder, basil, oregano, Real Salt, and Bragg Liquid Aminos. (I never measure out the seasonings, I just add them. I find it’s best to add way more than you’d think, but you’ll get the hang of what you like with a little taste testing.)
DO NOT DRAIN THE FAT! THE FAT IS VERY GOOD FOR YOU!! (Unless you’re using venison. Draining the fat will help to get rid of the gamy taste.)
Simmer. Turn off the heat and let the meat sit covered and soaking up all of the juices for about 10 minutes.
Taco Meat
Get your toppings ready. While the meat settles, chop up some fresh lettuce and tomatoes, get out the shredded cheese, sour cream, jalapenos, hot sauce, and choose between a taco salad, tacos in a hard shell, a soft shell taco, a taco chips and cheese plate…or my favorite fried flour tortillas! (To make fried flour tortillas, heat up some coconut oil in a pan on medium to high heat, fry the flour tortillas for about 10 seconds on each side, fold in half to cool, and enjoy the most amazing flavor of your life!)
This is a pretty basic recipe for chili, but hidden under it’s simplicity is a complexity of layers that make it completely amazing. After a cold afternoon of playing outside, there is nothing better than a nice bowl of homemade chili to warm you up.! The great thing about this basic recipe is that by adding whatever extras you have in your fridge, it will be different every time.
Ingredients
1 lb. Ground Beef(Finding a local source of grass-fed beef is best, or you can buy it here.)
1 bag of Tomato Puree(You could also use 2 cans of organic whole stewed tomatoes.)
2 Cans of Kidney Beans(If I had the time, I would soak some organic kidney beans on low heat with a glug of apple cider vinegar and a spoonful of freshly ground wheat or rye flour to unlock the phytase that will break down the phytic acid. Find out why here.)
*Veggies: Sometimes, a simple chili is best, but sometimes I like adding a bunch of veggies like zucchini, cauliflower, carrots, and celery.)
1 Medium Onion
3 Cloves of Garlic
2 t. Real Salt (I buy my Real Salt in bulk here, you can buy a shaker here, or a refill pouch here.)
3 T. Butter
2 t. Ground Oregano
2 t. Ground Basil
2 t. Garlic Powder
2 t. Onion Powder
2 t. Bragg Liquid Aminos
2 t. Chili Powder
*1 t. Cayenne Pepper(I just add this to my own personal bowl of chili so that the kids can eat it!)
Directions
Prepare the Pan: I love using my cast iron skillet for this recipe! Let the pan slowly heat up on a low to medium setting and allow the butter to melt and coat the pan.
Cured Cast Iron Skillet
Cook the Onion and Garlic: Chop up the onion, peel the garlic and crush it in a garlic press and add both to the bubbling butter. Cook and stir for about 2 minutes.
Add the Beef: Once the onion is soft, add the ground beef. Break it apart a little bit at a time as it cooks, and flip it as each side is browned.
Browning the Beef
Season the Meat: Once the beef is fully browned, add the garlic powder, onion powder, basil, oregano, Real Salt, and Bragg Liquid Aminos. (I never measure out the seasonings. I just sprinkle them on the meat until it’s fairly covered. I always end up adding more than I think I should, and this gives it the best flavor.)
Simmer: Turn off the heat and let the meat sit covered and soaking up all of the juices while you prepare the rest of the soup. *This is the same recipe as my taco meat!
Add Tomatoes and Beans: In a large pot, add the tomato puree and the drained cans of beans. Slowly heat them up to a low simmer on a low-medium setting (like a 4).
Add the Beef: Add the browned beef and stir. Let it simmer on a low heat for a bit, or just eat it right away if you can’t wait!
*Saute the Veggies: If you want to add more vegetables, don’t just dice them up and throw them in the pot! Saute each batch of veggies with a bit of oil and the same seasonings you added to the meat.
Seasoned Zucchini and Celery Sauteing
Season to Taste: Add more of the seasonings that you added to the meat. Keep adding and tasting until you get it just right.
Serve: Serve with some tortilla chips and fresh sour cream for a perfect meal.
In Conclusion
There are many different ways you can make chili. Sometimes, you might just want to empty out what you have in your fridge, and other times you might want something more traditional. I think it’s fun to be able to make the same meal often, but mix it up so that it seems different. So get creative, follow your cravings, and enjoy!