• Facebook
  • Instagram
  • Youtube
  • Pinterest
Embracing Motherhood
  • Blogs
  • Resource Guide
  • TPT
  • YouTube
  • Etsy
  • Search
  • Menu Menu

How to Make Hard Boiled Eggs That Will Peel Easily

Eggs, General, Recipes
How to Make Hard Boiled Eggs That Will Peel Easily

Making the perfect boiled eggs that are easy to peel is truly a culinary mystery, one that I have tried and failed to perform accurately for years and years until I discovered this amazing method that makes hard boiled eggs easy to peel. Every. Single Time.

perfectly cooked hard boiled egg with shell peeling off easily

Perfectly Cooked Easy to Peel Hard Boiled Egg

hard boiled egg that is too hard to peel

Avoid Hard Boiled Eggs that are Hard to Peel

Ingredients/Materials

  • 12 Eggs (Two weeks old and pastured)
  • 1 t. Salt
  • Large Pot (Like this. Big enough to fit all of the eggs and at least an inch of water)
  • Water

Directions

  1. Choose Old Eggs: The trick to boiling eggs that will peel easily is to make sure they are old. This is because as an egg ages, carbon dioxide (which is a weak acid) leaks out through the pores in the egg’s shell, making the egg whites less acidic, and the more acidic the egg is, the harder it is to peel. We get our eggs fresh from a neighbor who raises pastured chickens, and I always set one or two dozen eggs aside to “age”. Fresh eggs need about two weeks to age, but one week will be better than nothing. If you get your eggs from the store, they will obviously not be as fresh and need less time to “age”.
  2. Cook Your Eggs: Place your eggs in a large pot and cover with enough cool to lukewarm water so that they are well submerged. Add a teaspoon of salt which will help the whites from leaking if the shell cracks. Turn the burner to an 8 or 9 (medium high heat) until the water boils. Turn the burner off and set a timer for eight minutes.hard boiled eggs in a pot of boiling waterEggs Boiling
  3. Cool Water Bath: Put a strainer in the sink and empty the pot into it. Put a stopper in the sink, dump the eggs out of the strainer, and fill with cold water until the eggs are fully submerged. You can even add a few ice cubes if you want to get fancy.
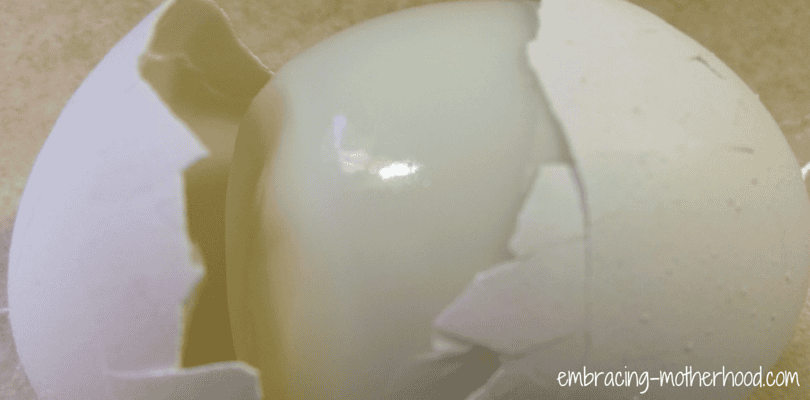
  4. Peel Your Eggs: I usually just gently crack the egg and peel it under water, but you can also gently roll the egg instead of cracking it. There’s a thin film under the shell, and once you get underneath that with your fingernails, the eggshell should peel away easily.

    a gently rolled hard boiled egg that will make it easier to peel

    Roll Your Hard Boiled Eggs Before Peeling

  5. Check Your Eggs: Peel one egg and cut it in half to see if it’s cooked to your liking. You want the yolk to be soft but not runny. Shorter cooking times will help the egg to retain more of it’s nutrients. Also, shorter and lower heat cause less oxidation of cholesterol which can damage your arteries. Also notice how these yolks are almost orange, this is because these are pastured eggs and higher in nutrients.

    perfectly cooked hard boiled egg cut in half to show the yolks still soft

    Soft Yolks on Hard Boiled Eggs

In Conclusion

Now, even though you know that the secret to perfectly peeled hard boiled eggs, you just know that there will come a time when you HAVE to have a hard boiled egg and you only have fresh eggs. So, here’s what you do. Boil your eggs as usual, roll them to get them cracked, and then soak them in a large pot water. As you’re peeling the eggs, you can keep dipping them back into the water to get the water to go under the shell and to help remove any little bits along the way. This will work on some of the eggs, but probably not all.

Eggs are an amazing superfood, especially if they’re pastured, and having hard boiled eggs on hand ensures that you have a protein rich nutrient dense snack to grab at a moment’s notice. I always like having a carton of hard boiled eggs in my refrigerator for a quick snack or to put on salads. I also really like using them to make egg and potato salad and deviled eggs.

tray of deviled eggs make a perfect party appetizer

Best Deviled Eggs

June 9, 2015/by Stacey Maaser
https://embracing-motherhood.com/wp-content/uploads/2015/06/hard-boiled-egg.png 400 810 Stacey Maaser https://embracing-motherhood.com/wp-content/uploads/2018/01/EM_Logo.png Stacey Maaser2015-06-09 10:20:322024-06-06 14:05:50How to Make Hard Boiled Eggs That Will Peel Easily

How to Make the Best Potato and Egg Salad

Eggs, General, Potatoes, Recipes

There are lots of recipes for potato salad out there, but I’m not kidding when I say that this is the best! It’s all about the simplicity of the recipe and the quality of the ingredients. When you buy organic potatoes and pastured eggs and use Bragg’s Apple Cider Vinegar, Hellman’s Mayonnaise, Real Salt, fresh organic parsley, you have the makings for a winning recipe. Not only does this recipe, taste good, it’s good for you too. So, let’s get to it!

Ingredients

  • 4-5 Medium Sized Organic Potatoes
  • 10-12 Eggs (Preferably pastured)
  • 8 T. Mayonnaise (Hellmann’s)
  • 1 T. Mustard
  • 2 T. Apple Cider Vinegar
  • 2 t. Real Salt
  • 1 t. Dill
  • ½ t. Pepper
  • 1 t. Celery Seed
  • *1 t. Cayenne Pepper (If you like things on the spicy side.)
  • Extras: Chop up any of these items to give it a little pizzazz.
    • Fresh Organic Parsley
    • 1-2 Chives
    • 4 Small Pickles
    • ½ c. Celery
    • 2-3 Pieces of Bacon

Directions

  1. Cut the potatoes into cubes. (I don’t bother to skin them, but you could.) Make sure they are covered by about an inch and a half of water, and heavily salt the water (this brings out the flavor of the potatoes).

    raw_potatoes_chopped_up

    Raw Potatoes with the Skins On

  2. Bring the water to a slow boil, then turn down the heat and simmer for about 12-15 minutes. Check the potatoes at about 12 minutes. (If you cook them too long, they will lose their firmness and texture and it will be more like mashed potato salad.) Dump them into a strainer, and run cold water over them to stop them from cooking any further.

    cooked_diced_potatoes

    Cooked Potatoes in a Colander

  3. Boil your eggs. Check out my blog here to learn how to boil the perfect egg that’s easy to peel.
  4. Chop up the eggs into cubes. I just use a basic egg slicer.

    chopped_egg

    Cubed Hard Boiled Eggs

  5. Mix in the mayonnaise, mustard, and apple cider vinegar.
  6. Add the potatoes. I don’t mind if the eggs get mashed up a bit, but I like to be gentle with my potatoes so that they’ll hold their shape.

    Eggs, Potatoes, Mayo, Mustard, and Apple Cider Vinegar

    Eggs, Potatoes, Mayo, Mustard, and Apple Cider Vinegar

  7. Add the salt, pepper, celery salt, and dill. I really never measure out my spices, especially salt. I just add a little, taste a little, add a little more, and taste again until it’s just right.
  8. I like to add finely chopped fresh parsley, chives, and pickles to my potato salad, but add whatever extras suit your fancy.

    parsley_chive_pickles

    Parsley, Chive, and Pickles

  9. I just so happened to have some crispy freshly cooked bacon around after making this potato salad, and I thought, what the hey, everything’s better with bacon! So I crumbled some up, and sprinkled it on top of my potato salad. It was amazing.

    potato_salad_with_bacon

    Bacon Topped Potato Salad

  10. So what are you waiting for? Go make some dang egg and potato salad already! (*Note: since 2018, I have used a keto diet to help me maintain a lower weight, so I don’t use the potatoes anymore.)
April 11, 2015/by Stacey Maaser
https://embracing-motherhood.com/wp-content/uploads/2015/04/Untitled-design-3.png 400 810 Stacey Maaser https://embracing-motherhood.com/wp-content/uploads/2018/01/EM_Logo.png Stacey Maaser2015-04-11 18:28:082020-11-20 18:26:42How to Make the Best Potato and Egg Salad

How to Make the Perfect Fried Egg

Eggs, General, Recipes
fried eggs cooked in a cast iron skillet

There are so many different types of egg dishes to consider making, but my each of my four kids have gone through a phase when one of their favorite foods was a perfectly cooked fried egg. Just like all of my other egg recipes, this one is simple and easy to follow, and will soon become a family favorite in your home too.

Ingredients

  • 3-4 Eggs (Preferably Pastured)
  • 1 T. Coconut Oil
  • ½ t. Salt (I buy my Real Salt in bulk here. You can buy a shaker here, or a refill pouch here.)
  • ¼ t. Pepper
  • 1 T. Butter
  • ½ c. Cheese (Optional)

Directions

  1. Cure the Cast Iron Skillet: If you’re using a cast iron skillet, which I recommend, then you’ll want to make sure it’s cured properly before beginning.
  2. Coconut Oil: Plop in a dollop of coconut oil and let the pan warm up for a good 3-5 minutes on a low setting. (This helps to ensure that the skillet is properly cured even more.)

    Coconut oil melting on a cast iron skillet

    Coconut Oil Melting on a Cast Iron Skillet

  3. Turn Up the Heat: Turn the heat up to a 3 or 4 and if you have the patience, let it heat up for another few minutes.
  4. Crack the Eggs: I usually like to cook three or four eggs at a time.

    fried eggs just starting to cook in a cast iron skillet

    Fried Eggs Just Hit the Cast Iron Skillet

  5. Break the Yolks: Puncture the yolks by making an X in them with the spatula. (Don’t get too crazy here, you want the white and yellow parts of the egg to stay somewhat separate.)
    fried eggs halfway cooked with yolks broken

    Fried Eggs with Broken Yolks


  6. Cover and Cook: Cover the pan with a lid and cook on a 3 for about 8 minutes. Check the eggs after about 4 minutes. If they’re not really cooking yet, turn it up a bit. If the oil is bubbling and the eggs are cooking too fast, turn it down.)

    Fried eggs covered and cooking.

    Fried Eggs Covered and Cooking

  7. Flip: Once the eggs are cooked almost all the way through, it’s time to flip.
    fried eggs ready to flip in a cast iron skillet

    Fried Eggs Ready to Flip

    fried eggs cooked and flipped in a cast iron skillet

    Fried Eggs Flipped

  8. Cheese: If you want cheese, add it now. Either shredded or sliced will work just fine.
  9. Cover and Turn Off the Heat: Let the eggs finish cooking for a minute or two, or wait until the cheese melts.

    cooked fried eggs with melted cheese in a cast iron skillet

    Fried Eggs with Cheese

  10. Serve: If I’m serving the eggs plain without any cheese, I like to add a large pat of butter. Then I cut the eggs up into bite size pieces and serve. These eggs also work really well in egg sandwiches.
    cooked fried eggs with melted cheese and bacon on a plate

    Cooked Fried Eggs with Cheese Served with Bacon

    One Egg with Melted Cheese Cut Up and Ready to Eat!

    One Egg with Melted Cheese Cut Up and Ready to Eat!

March 31, 2015/by Stacey Maaser
https://embracing-motherhood.com/wp-content/uploads/2015/04/Untitled-design-8.png 400 810 Stacey Maaser https://embracing-motherhood.com/wp-content/uploads/2018/01/EM_Logo.png Stacey Maaser2015-03-31 12:23:282020-11-20 18:42:21How to Make the Perfect Fried Egg

How to Cook the Perfect Sunny Side Up Eggs

Eggs, General, Recipes
perfectly cooked sunny side up eggs with sourdough muffins

Frying an egg might seem like the simplest of culinary feats, but it can also be one of the most challenging..especially if you want to cook an egg just perfectly so that the white part is completely cooked and the yolk is nice and dippy. For years and years, I would proclaim to my husband that we were having sunny side up eggs for breakfast, only to serve them over medium time and time again. But I have FINALLY figured out how to cook the PERFECT  sunny side up egg. Every. Single. Time.

Ingredients

  • 3-4 Eggs (Preferably pastured)
  • 1 T. Olive Oil
  • 1 T. Coconut Oil
  • 1 t. Real Salt (I buy my Real Salt in bulk here. You can buy a shaker here, or a refill pouch here.)
  • ½ t. Pepper
  • Sourdough Muffins
  • 1 T. Butter

Directions

  1. Cure the Cast Iron Skillet: If you are cooking with a cast iron skillet (which I recommend for pretty much everything), then you’ll want to make sure it’s properly cured before you begin. Even if it’s been cured recently, I recommend running some hot water over it to clean out any bits of food, pouring in a fresh glug of olive oil, and letting it sit at the lowest setting on your stove for about thirty minutes to an hour.
  2. Coconut Oil (or Butter): Add a dollop of coconut oil and turn the heat up to a 3 or 4 for a few minutes.

    Coconut Oil Melting on a Cast Iron Skillet

    Coconut Oil Melting on a Cast Iron Skillet

  3. Add the Eggs: Make sure the coconut oil is melted and the pan has had plenty of time to heat up (a few minutes at least), and then crack the eggs into the pan.

    three sunny side up eggs just starting to cook in a cast iron skillet

    Sunny Side Up Eggs Just Starting to Cook

  4. Cook Low and Slow: The trick with just about every egg dish is to cook them at a low temperature for a long time. Resist the temptation to turn the heat up because you’ll turn your back for ONE SECOND and the eggs will be overcooked. You’ll want to cook them for about ten minutes or so. If the eggs are just not cooking after some time, turn the heat up just a titch, and if the oil is starting to bubble, turn the heat down a smidgen. DON’T COVER WITH A LID! You might think that it will help cook the tops, but it won’t. It will just overcook the eggs.

    three sunny side up eggs cooked halfway through on a cast iron skillet

    Sunny Side Up Eggs Halfway Cooked

  5. Add the Salt and Pepper: At any point after you’ve cracked the eggs, go ahead and sprinkle on some salt and pepper.

    three sunny side up eggs almost ready to flip on a cast iron skillet

    Sunny Side Up Eggs Sprinkled with Salt and Pepper

  6. Time to Flip: Once the eggs are cooked just about all the way through, they are ready to be flipped.
    three sunny side up eggs being flipped in a cast iron skillet

    These Sunny Side Up Eggs are Ready to Flip

    Flipping the Eggs

    Flipping the Eggs

  7. Keep it Quick: To make a truly perfect dippy egg, you’ll only want to keep the egg flipped for no more than ten seconds. If you keep it flipped for about 30-40 seconds, you’ll notice that the egg is still dippy, but more firm around the edges. Any longer, and you’ve ruined the whole thing, and you might as well start over. Just make sure the whites are cooked through all the way because it’s really gross when they’re not.
    showing how sunny side up eggs only need to stay flipped for a very short time

    Sunny Side Up Eggs Cooked to Perfection

    In the picture above, the egg with the fork next to it was flipped for about 45 seconds, the egg in the middle was flipped for about 30 seconds, and the egg on the right was only flipped for about 5 seconds.

  8. Check the Pan: You’ll know if your cast iron skillet was cured properly (and that you didn’t cook the eggs at too high of a temperature) if your pan looks like this when you are done.

    after cooking sunny side up eggs this cast iron skillet still looks clean

    Cast Iron Skillet After Cooking Sunny Side Up Eggs

  9. Enjoy: Serve with some toasted and buttered sourdough muffins, a few slices of bacon, and a tall glass of milk for an amazing breakfast! (Also, make sure to sprinkle those yolks with a generous helping of Real Salt!)

    three sunny side up eggs, sourdough muffin, bacon, and milk make the perfect breakfast

    Sunny Side Up Eggs, Sourdough Muffin, Bacon, and Milk…the Perfect Breakfast!

March 29, 2015/by Stacey Maaser
https://embracing-motherhood.com/wp-content/uploads/2015/03/Untitled-design-31.png 400 810 Stacey Maaser https://embracing-motherhood.com/wp-content/uploads/2018/01/EM_Logo.png Stacey Maaser2015-03-29 17:13:562020-11-20 18:44:59How to Cook the Perfect Sunny Side Up Eggs

How to Make the Best Deviled Eggs

Eggs, General, Recipes
perfectly presented deviled eggs

Deviled eggs are kind of my thing. Whenever we go to a gathering that is potluck style, I love bringing a big platter of freshly made deviled eggs. Some of our neighbors raise pastured chickens and sell us their eggs for $2/dozen, and I hate saying no since we are their only customers, so some weeks we have 6+ dozen eggs to consume! I love making fried eggs, scrambled eggs, dippy eggs, egg sandwiches, potato egg salad, and baked egg dishes, but my favorite thing to make (and eat) are these deviled eggs.

Ingredients

  • 12 Eggs (Two weeks old and pastured)
  • 4 T. Mayonnaise (I like Hellmann’s Olive Oil)
  • 1 t. Mustard
  • 3 t. Apple Cider Vinegar (I like Bragg’s)
  • ½ t. Real Salt (I buy my Real Salt in bulk here. You can buy a shaker here, or a refill pouch here.)
  • ¼ t. Pepper
  • ¼ t. Paprika

Directions

  1. Boil Your Eggs: To see how to boil an egg so that it is cooked to perfection and peels easily, check out my recipe for the perfect boiled egg.

    perfectly cooked hard boiled egg cut in half to show the yolks still soft

    Perfectly Cooked Hard Boiled Egg

  2. Make the Yolk Mixture: To be honest, I never really measure my ingredients here. I just add a big blob of mayonnaise until it’s nice and creamy, then I add a squirt of mustard, a glug of apple cider vinegar, a few dashes of pepper, and a generous sprinkling of salt. Then I keep tasting and adding and tasting and adding. It’s always best to start with too little of something and add more than add too much of something and have to start over! You can use the measurements I’ve listed above as a starting point to create the mixture that you like best. 🙂 Also, sometimes I like a little taste explosion and add some chopped pickle and celery into the mixture.
  3. yolk mixture for deviled eggs will be creamy and slightly lumpy

    Yolk Mixture for Deviled Eggs

  4. Fill the Eggs: I just use a spoon to fill the empty egg halves, but you could get super fancy with these cake decorating tips and bags.

    hard boiled eggs cut in half with yolks removed ready for deviled egg yolk mixture filling

    Empty Deviled Eggs Ready for Filling

  5. Finishing Touches: I like to lightly sprinkle paprika over all the eggs when they are filled. (I don’t think they really look like deviled eggs without it!) I use a plastic egg serving tray, but this glass one would be nice too, or you might want something more portable like this or this. If you’re going to top with plastic wrap, make sure you add some toothpicks so it won’t stick to the yolk mixture. Enjoy!

    tray of deviled eggs make a perfect party appetizer

    Tray of Deviled Eggs

March 28, 2015/by Stacey Maaser
https://embracing-motherhood.com/wp-content/uploads/2015/03/Untitled-design-21.png 400 810 Stacey Maaser https://embracing-motherhood.com/wp-content/uploads/2018/01/EM_Logo.png Stacey Maaser2015-03-28 14:51:102020-11-20 18:46:11How to Make the Best Deviled Eggs

How to Make the Best Egg Sandwiches

Eggs, General, Recipes
Embracing Motherhood How to Make the Best Egg Sandwiches

Egg sandwiches are a delicious and portable breakfast that you can take anywhere! I love making a pile of egg sandwiches in the morning and then enjoy watching them disappear throughout the day. My husband enjoys intermittent fasting and so he pops home around mid-day and can grab one without any fuss, and my daughter enjoys eating one for her after school snack. Sometimes I get so busy in my mornings that I forget to eat, but if there’s a pile of egg sandwiches, I have no excuse!

Ingredients

  • 4 Eggs (Preferably pastured)
  • ¼ c. Raw Milk
  • Real Salt (I buy my Real Salt in bulk here, you can buy a shaker here, or a refill pouch here.)
  • Pepper
  • ¼ c. Cheddar Cheese (Shredded or sliced)
  • Sourdough Muffins
  • 2 t. Butter

Directions

There are two ways to make egg sandwiches. 1) You can use scrambled eggs, which can be a little more difficult to balance the on the muffin, but they are oh so light, fluffy, and delicious! 2) Or you can use fried eggs which pack up a little better and give you that “Egg McMuffin” taste that you might crave from time to time.

Scrambled Egg Sandwich

  1. Cook the Perfect Scrambled Eggs: Check out my recipe for how to make the perfect scrambled eggs every time using a perfectly cured cast iron skillet.
  2. Melt the Cheese: Once your eggs have been cooked to perfection, I like to first top them with a large pat of butter, stir and melt it around, then add a fresh sprinkling of salt, and finally add shredded cheese. Cover, turn off the heat, and let it melt.
  3. Put Eggs on the Sourdough Muffin: Check out my sourdough muffin recipe to see how to make some delicious “English Muffins” that free from phytic acid and taste great! Scoop out a generous amount of eggs onto the buttered muffin and press the top down.
scrambled egg sandwich with melted cheese on a sourdough muffin

Scrambled Egg Sandwich


Fried Egg Sandwich

  1. Cook the Perfect Fried Eggs: Check out my recipe for how to make the perfect fried eggs every time using a perfectly cured cast iron skillet.
  2. Melt the Cheese: Once your eggs have been cooked to perfection, I like to first top them with a large pat of butter, stir and melt it around, then add a fresh sprinkling of salt, and finally add shredded cheese. Cover, turn off the heat, and let it melt.
  3. Cut and Fold the Eggs: Once you separate the eggs into individual servings, you’ll want to fold them in half so that they’ll fit more easily on the muffin. I like to cut off the little triangle piece so that it’s the best fit. Then I take the little triangles, cut them up a little more, and serve them on the side.

    fried eggs with melted cheese folded and cut for an egg sandwich

    Fried Eggs Folded In Half and Cut to Fit on an Egg Sandwich

  4. Put Eggs on the Sourdough Muffin: Check out my sourdough muffin recipe to see how to make some delicious “English Muffins” that free from phytic acid and taste great! Scoop out a generous amount of eggs onto the buttered muffin and press the top down.

    fried egg sandwich with melted cheese on a sourdough muffin

    Fried Egg Sandwich

Variations: There are plenty of other toppings that you can add to make your egg sandwich even better. Here are some of the topping I enjoy adding periodically.

egg sandwich with jalapenos

Egg Sandwich with Jalapeños

  • Crumbled Bacon
  • Fried Lunchmeat
  • Taco Meat
  • Sliced Jalapeños
  • Diced Green Pepper
  • Tomato Slices
  • Fresh Parsley
  • Garlic Slices (As long as I’m not going to talk to anyone who will care about my breath!)
March 24, 2015/by Stacey Maaser
https://embracing-motherhood.com/wp-content/uploads/2015/04/embracing-motherhood.com-12.png 400 810 Stacey Maaser https://embracing-motherhood.com/wp-content/uploads/2018/01/EM_Logo.png Stacey Maaser2015-03-24 11:39:292024-06-06 14:03:54How to Make the Best Egg Sandwiches

How to Make the Best Scrambled Eggs

Eggs, General, Recipes
perfect scrambled eggs cooked in a cast iron skillet

Scrambled eggs are an absolute staple in our family. I usually cook some kind of eggs every morning. Sometimes I’ll be in the mood for scrambled eggs, but it may be a day for some sunny side up eggs or a baked egg dish. You never know! Anyways, knowing how to make REALLY GOOD scrambled eggs is one of the first lessons a mom chef needs to learn.

Ingredients

  • 4 Eggs (Pastured is best.)
  • ¼ c. Milk (Raw is best.)
  • 1 t. Real Salt (I buy my Real Salt in bulk here. You can buy a shaker here, or a refill pouch here.)
  • ½ t. Pepper
  • 2 T. Butter
  • 1 c. Shredded Cheddar Cheese

Directions

  1. Cure the Cast Iron Skillet: If you are cooking with a cast iron skillet (which I recommend for pretty much everything), then you’ll want to make sure it’s properly cured before you begin. Even if it’s been cured recently, I recommend running some hot water over it to clean out any bits of food, pouring in a fresh glug of olive oil, and letting it sit at the lowest setting on your stove for about thirty minutes to an hour.
  2. Coconut Oil (or Butter): Add a dollop of coconut oil and turn the heat up to a 3 or 4 for a few minutes.

    Coconut Oil Melting on a Cast Iron Skillet

    Coconut Oil Melting on a Cast Iron Skillet

  3. Mix the Eggs: While the pan is preheating, combine the eggs, milk (you can always substitute water if you’re out of milk), salt, and pepper.
    eggs, milk, salt, pepper ready to mix for scrambled eggs

    Eggs, Milk, Salt, and Pepper

    If it suits your fancy, you can add a few other spices like maybe some cayenne pepper, onion powder, of some chives. Get crazy! Mix really well.

    scrambled egg mixture mixed until it's nice and bubbly

    Scrambled Egg Mixture

  4. Add the Eggs: Make sure the coconut oil is melted and the pan has had plenty of time to heat up (a few minutes at least), then pour in the eggs. If the pan sizzles as you add the eggs, you know the temperature is just right. (But don’t worry if it doesn’t, it’s better too cook too low than too high.)
  5. Cover and Cook: The key to making really good scrambled eggs is to cook them at a low temperature and to cook them cook slowly. If you lift up the lid and nothing is going on, turn up the dial a titch. But keep your eye on it, because they can burn quickly!  It’s better to start too low than too high.

    scrambled eggs cooking nice and slow so that they don't burn

    Scrambled Eggs Cooked Halfway Through

  6. Stir: After you can see that the eggs have cooked a considerable amount, start to stir. Start by flipping the eggs over, then chop them up (I prefer semi-big chunks) as you move them around. Just don’t over stir, you’ll make the pieces too small and they’ll lose their softness.

    IMG_8723

    Cooked Scrambled Eggs

  7. Add Butter: Add a big chunk of butter, let it melt, then stir it around to mix it in.

    cooked scrambled eggs with melting butter in a cast iron skillet

    Scrambled Eggs with Butter

  8. Add More Salt: This is when I like to add a fresh sprinkling of salt.

    cooked scrambled eggs with butter and salt in a cast iron skillet

    Scrambled Eggs with Butter and Salt

  9. Add Cheese: Sprinkle on some shredded cheese, cover with a lid, and turn the stove off until it melts.
    cooked scrambled eggs with shredded cheese about to melt

    Cooked Scrambled Eggs with Shredded Cheese Ready to Melt

    cooked scrambled eggs with melted cheese in a cast iron skillet

    Cooked Scrambled Eggs with Melted Cheese

  10. Serve: This is another kid favorite in our house!

    cooked scrambled eggs with melted cheese on a plate with a kids fork

    Kid’s Plate with Scrambled Eggs

March 24, 2015/by Stacey Maaser
https://embracing-motherhood.com/wp-content/uploads/2015/04/embracing-motherhood.com-5.png 400 810 Stacey Maaser https://embracing-motherhood.com/wp-content/uploads/2018/01/EM_Logo.png Stacey Maaser2015-03-24 11:24:272020-11-18 09:35:35How to Make the Best Scrambled Eggs

Search

Stacey Maaser

Stacey Maaser author of Embracing Motherhood

Author of Embracing Motherhood

Affiliate Links

I participate in the Amazon Services LLC Associates Program, which is an affiliate advertising program. As an Amazon Associate I earn from qualifying purchases.

Recent Posts

  • Best Broccoli and Cheese Soup
  • Why Ages 0-3 are the MOST Crucial Years of Brain Development
  • Teach Your Toddler How to Read
  • Teach Your Baby How to Read
  • Free ABC Resources to Help You Teach Your Child to Read
  • Teach Your Child the Other Consonant Sounds with These Free Resources
  • We Use Our Trampoline Just About Every Day!
  • How to Start a Homeschool Routine During Covid-19
  • 26 Learning Centers for a Homeschool Preschool Environment
  • How to Make Whole Wheat Sourdough Muffins

Hi, I’m Stacey Maaser,

author of Embracing Motherhood! I am a stay at home mother of 5 with 7 years of teaching experience and a Master’s degree in Curriculum and Instruction. I am passionate about teaching my children, feeding them healthy food, learning the truth about things (not just what is popular opinion or counter culture), and sharing what I’ve learned and experienced with others. Thanks for stopping by!

About Me
About Embracing Motherhood

Newsletter Signup

HOME     BLOGS    RESOURCE GUIDE    YOUTUBE    TPT    ETSY

The information on this website has not been evaluated by the FDA and is not intended to diagnose, treat, prevent, or cure any disease. By accessing or using this website, you agree to abide by the Terms of Service, Full Disclaimer, Privacy Policy, Affiliate Disclosure, and Comment Policy. Content may not be reproduced in any form.

Terms of Service | Full Disclaimer | Affiliate Disclosure | Comment Policy | Privacy Policy

Copyright © 2025 Embracing Motherhood. All rights reserved. Site by CurlyHost.
  • Facebook
  • Instagram
  • Youtube
  • Pinterest
Scroll to top
 

Loading Comments...