• Facebook
  • Instagram
  • Youtube
  • Pinterest
Embracing Motherhood
  • Blogs
  • Resource Guide
  • TPT
  • YouTube
  • Etsy
  • Search
  • Menu Menu

Tag Archive for: pre-reading

#2-How to Engage Your Baby or Young Child with Reading

General, Teach Your Child to Read, Teaching
how to engage your baby with reading

When should you start reading to your child? The answer is…right now! I mean really, you can start reading while your baby is still in the womb. Babies develop their sense of hearing at 18 weeks and can respond to noise at 25 weeks. The cadence (the flow of language) and prosody (tune and rhythm) of reading sounds are different than normal speech and children can become attuned to them in the womb. It’s easy for your baby to pick this up when you have other children that you’re reading to, but if you don’t, don’t be embarrassed to read to your belly! (This is the best book to read in utero.)

I like to start reading regularly with my babies when they are about 3-4 months old. At this point, they can hold their heads up, grab things, follow a moving object, and are more interested in shapes and patterns. The neural brain explosion occurs when babies are 6 months old, so you definitely want to make sure you’re reading by then.

Reading with 3 Month Old Jack

Reading with 3 Month Old Jack

What Babies First Learn About Reading

  • What books are
  • How to hold a book
  • How to turn pages
  • Reading happens from left to right
  • Books have words and pictures
  • How to interact with books (get interactive books)
  • What a reading voice sounds like (the cadence and prosody of reading)
  • That reading is special and fun

How to Read with Your Baby

First of all, you need to make reading special. Get stacks of really good books that your baby will love, and put them near your rocking chair, the couch, and your arm chair. (I like keeping my books in baskets like this.) Make sure your baby is fed, rested, and happy, and then introduce a book. At first, babies will interact with a new book as they would any other toy, but after reading it over and over and over again, you will be completely blown away when your baby starts to recognize it. With some books, I also enjoy turning it into a song.

1. In Utero

The bond between a mother and child is so special and so unique – two beings occupying one body, two heartbeats beating within the same space, and two bodies being nourished simultaneously. As soon as 24 weeks, a baby can hear his or her mother’s voice and becomes accustomed to it enough to respond to it over a stranger’s after birth. In the 1980s, psychology professor Anthony James DeCasper and colleagues at the University of North Carolina at Greensboro discovered that soon after birth, a newborn prefers a story (in this case, Cat in the Hat) that had been read repeatedly in the womb over a new story. (Read the article here.)

Reading to Ophelia While Pregnant for Jack

Reading to Ophelia While Pregnant for Jack

There is a certain cadence and prosody to reading that a newborn can resonate with as you read to him or her in the womb. This may be a natural part of his or her development if you have other children, but if not, don’t feel silly about getting comfortable in the rocking chair and reading the same book over and over again to your belly. I always read, “Oh Baby, the Places You’ll Go,” when I was pregnant for my firstborn, Ruby, and it brought tears to my eyes every time. After that, the babies in my belly got read to as I read to my other children as they shared a lap with their new growing sibling.

2. 4th Trimester Bonding Time

Now, this may not seem like a part of the reading process, but it’s all connected. Reading is a very bonding experience, and your children’s bond with reading will be connected to their bond with you. For the first three months of life, your baby is figuring out life outside of the womb in a fourth trimester that is every bit as important as the other three trimesters of pregnancy.

Your baby needs you to figure them out, to hold them, to fall in love, and to help them adjust to this world of lights, voices, air, food, and you. I typically don’t introduce reading during this phase. Instead, I am just hyper focused on connecting with them in whatever ways come naturally. I am aware that new babies can only see about 8 to 10 inches in front of their faces, so I try to keep my face in that range so that we can get to know each other. Just smiling, cooing, talking softly, holding, cuddling, rocking, nursing, and sleeping are the most important activities during this time.

3. Introducing Books

As babies reach the end of their fourth trimester, usually when they are about three months old, they will be able to start following moving objects with their eyes. This is a good time to start introducing them to books.

3 Month Old Julian Practicing Tummy Time While Looking at His Favorite Book

3 Month Old Julian Practicing Tummy Time While Looking at His Favorite Book

I like to pick a couple of board or cloth books to keep in their toy bin and read them often. I love to use books during tummy time. To be honest, I don’t really know if I’ve ever introduced books at this young of an age with my other children, and I was kind of shocked to see Julian so enraptured by this little counting book.

4. Create a Reading Environment

These are the ways that I have created a reading environment in my home. I have found that if you integrate reading into your daily life and make books easily accessible, children will be immersed in a world where they can’t help but read and see reading as a fun past time.

  • Make Books Easily Accessible – I love having baskets of books in every room of the house, and several baskets in our living room areas. I regularly sort them to make sure all books can be seen and are being used. If you keep books tucked away on bookshelves with only their spines showing, they won’t get used as much.

    Organizing My Books

    Organizing My Books

  • Build a Home Library of Books – To get your library started, go to thrift stores and garage sales to build the bulk of your collection. Once you start reading with your child, you’ll learn what he or she is into and get more books to satisfy his or her interests. Once you have a base collection, you can start adding new books that are really high quality, like these books from Usborne.
  • Trips to the Library – The librarians always look at me funny when I ask what the maximum number of books I can check out is (it’s 35). I love letting our kids pick out as many books as they want until we reach our limit. It’s always fun to have a new collection of books to read. I love watching as kids start picking out their own books that match their interests.

    Ruby Reading at the Library

    Ruby Reading at the Library

  • Make Comfy Reading Spaces– Making little reading stations with small chairs, bean bags, or little couches makes reading so much fun and encourages children to read independently. My children can often be found snacking while reading. I think it’s important to make sure children are fed and happy while reading to make it an enjoyable experience.
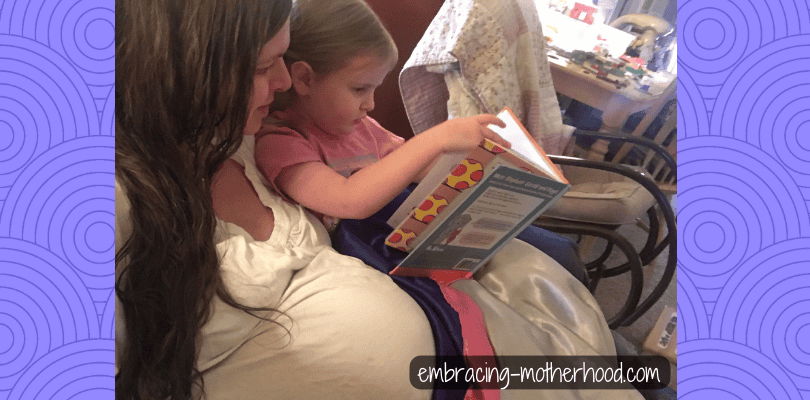
  • Lap Reading – I love pulling my little ones onto my lap while sitting in a comfy rocking chair or snuggling up next to them on the couch. Near these spots, I make sure to keep baskets of books, blankets to snuggle up in, and maybe some water too!

    My Reading Chair

    My Reading Chair

  • Books in Bed – Bedtime reading is a favorite part of our day. Each of our children have baskets of books next to their beds that are their personal favorites. We always read books at bedtime, and it is a special way to end the day. Also, since these books get read over and over and over, they are usually the first ones our little ones read since they have memorized all of the words.

    Bedtime Reading Routine

    Bedtime Reading Routine

5. Reading Routines

There are certain times I always like to read to my babies. I usually love to just nurse my babies to sleep, but when this stops happening, I like to incorporate some books (usually three) into our bedtime routine. I also love reading before nap time and then again when my babies first wake up. Before we begin reading, I make sure to “set the stage”. I have a nice comfy rocking chair next to a little table with a basket full of books that my baby loves, a soft lamp, and anything else we might need like milk or a pacifier. Then we get cuddled up with a nice soft silky and get to reading.

6. Repetitive Reading

Babies love things that are simple, repetitive, and familiar. But how do you make a new book familiar? Well, you have to start somewhere! Find a time when your baby has been fed, changed, and is in a happy and responsive mood, and then introduce the new book. If your baby doesn’t seem engaged, just try to get through it as quickly as possible. If you find something about the book that holds your child’s attention, spend some time talking about it. You don’t need to read the words from the book exactly. (“Do you like that kitty? That looks like our kitty, _______, doesn’t it? What does a kitty say? Meow! Do you want to pet the kitty? Pet her gently! Nice kitty.”)

Reading with Julian

Reading with Julian

After you’ve read through the book, put it aside and bring it out again the next day, and the day after that, and the day after that until it becomes familiar. If after reading the book several times, your baby still does not seem interested, then abandon it and choose something new. When your baby is older, he is going to blow you away when he crawls over to the basket of books that you have read so many times and starts flipping through the ones you have read over and over together.

7. Expressive Reading

When reading with little babies, they will not understand the words that you are reading, but they will comprehend the cadence, prosody, tone, intonation, and expression. I like to read with exaggerated expression in whatever way will elicit a positive response. In doing so, I sometimes make up words that are not in the text that will be best suited for such a response. For example, when I’m reading with my little ones, I like to call special attention to emotions and really act them out.

8. Interacting with Books

When children are familiar and comfortable with reading, they will show more and more signs that they want to get involved. I believe that the gradual release of responsibility model of teaching is phenomenal because it slowly builds a child’s confidence until they are ready to do it on their own. First, they start out watching you as you read, then you start to get them involved in little ways, and finally they will be reading completely on their own! Here are some of the ways you can slowly get your child involved in reading.

  • Turn the Page – I like to lift up the next page just a bit until my little ones grab on and turn the page. It’s amazing how much they enjoy this!
  • Interactive Books – I love reading books that have flaps, sounds, and more so that my little ones can see that books are meant to be engaging.
  • Pointing to Words – I don’t do this every time I read because it would get tedious and boring, but on occasion, I like to point to each word as I’m reading. This shows children how reading works and helps them to memorize new words in the context of a book.
  • Leaving Out Words – I love reading the same books over and over and over again with my children until they are practically memorized. Then, I start pausing at the last word on the page for them to say. I find that if I pause in sort of a questiony way, they will say it on their own. When they do, I point to the word as they are saying it. Once they’ve mastered reading the last word, I also like to incorporate leaving out other words in the book.
  • Picture Reading – I like to show my little ones how to “read” a book without any words by just talking about whatever I see in the pictures, and then I like to encourage them to do the same.
  • Repeated Reading – Whenever a child shows special interest in a book, I like to read it over and over as much as possible. This repeated reading will help children to memorize words that will become part of their word bank that they use for speedy reading.

9. Enjoy Yourself

The most important thing is to have fun with it! If you are enjoying yourself, your baby can tell and will respond positively. But if you’re looking at the clock thinking, “How long do I have to do this for?” your baby will also be able to tell. If you’re having a hard time getting into it, think about what would make it fun for you. Bring a special snack of cookies and milk along to nibble on while you read, make sure you’ve got a comfortable spot for reading set up, get some books that you enjoyed when you were a kid, just do whatever it takes to make it a fun experience full of love that will build positive memories for the future.

10. Don’t Force It

With our four children, I definitely notice that some have more of a patient and quiet personality and love cuddling up for hours on end reading books, while others have a much shorter attention span and would rather be active and moving around. This might be due to personality differences or it could just be because of the time of day. The important thing is to not force it. If you get everything ready to read and they squirm to get down or start fussing, then abandon it for another time. If you keep being persistent in your efforts, you will find the right moments to read. With some children, it just might happen at a higher frequency than others, and that’s ok!

Ophelia Likes to Have Her Silky and Her Milky When We Read

Ophelia Likes to Have Her Silky and Her Milky When We Read

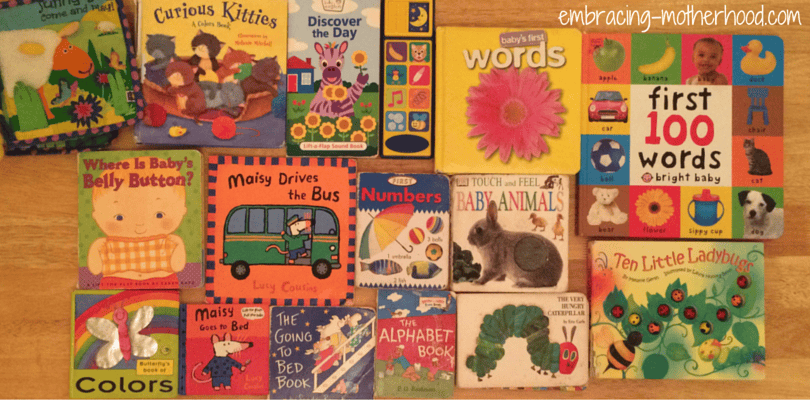
My Favorite Cloth Books

Board books are great, but for babies 3-6 months of age, I really love cloth books…especially when they start chewing on everything! There are so many different cloth books out there, but these are the ones that have stood the test of time for all five children. Read about my favorite board books here.

  • Discovery Farm – This cloth book has many moving parts and is very engaging. I bought this for Ruby and still have it for baby #5!
  • Peek-a-Boo Forest – Lamaze always has great toys and books. This cute little cloth book about an owl is wonderful.
  • Fuzzy Bee – This cloth book is another favorite that we have used with all five kids. I love the little animals and interactive parts and so do our babies!
  • Sunny Day Come and Play – This is another family favorite cloth book with great interactive pages. It’s made by Manhattan Toy, and I love pretty much everything they make.
  • Peekaboo, I Love You – This is another Lamaze cloth book that I LOVE. Peekaboo is such a fun baby game and incorporating it into reading is just a wonderful idea. My babies love this book!
  • Touchy Feely Board Books (That’s not my..) – These board books are very cute and simple with lots of interesting texture and repeated patterns. My older children even love them! This boxed set about zoo animals is a great collection.

In Conclusion

Reading with your baby shouldn’t be something you have to schedule in or even feel guilty about if you haven’t done it in awhile. If you set up an environment that is full of language rich experiences and lots of books, it will be easy to find moments here and there that are just right to snuggle up with a good book. If your baby is sitting on your lap, fed and content, and you’re wondering what to do beside having those wonderful face to face baby conversations, pick up a book and read it together!

For More Information

You’ll find everything you need to teach your child to read on my teachers pay teachers store which includes flashcards, videos, posters, and more! 

How to Teach Your Child to Read in 5 Simple Steps (Keeping it Simple)

  1. Language Rich Environment: Use oral language at the child’s level (Get down on the floor and play together!) and help them memorize vocabulary words. (Tell them the names of things!)
  2. Phonemic Awareness: Teach one sound for each letter of the alphabet. (Start with short vowels.)
  3. Phonics: Tap out sounds in three letter words to teach how sounds come together to make words.
  4. More Complex Phonemic Awareness: Introduce long vowels, digraphs, other vowel sounds, and complex consonants.
  5. Reading Comprehension Strategies: Use quality literature to interact with books and ask questions before, during, and after reading to make sure your child is understanding what is being read.

Teach Your Child to Read Blog Series (Digging Deeper)

  • #1-Oral Language Development Lays the Foundation for Reading
  • #2-How Engage Your Baby or Young Child with Reading
  • #3-Learning How to Read Begins with the ABCs
  • #4-Memorizing Words (Before Sounding Them Out) Leads to Reading
  • #5-Building Vocabulary with Numbers, Colors, and Shapes
  • #6-Teaching Phonics with Three Letter Word Families
  • #7-Unlock the Final Stages of Reading with Advanced Phonemic Awareness
  • #8-Reading Comprehension Strategies Lead to Independent Readers
  • #9-Reinforcing Reading with Writing
February 19, 2020/by Stacey Maaser
https://embracing-motherhood.com/wp-content/uploads/2017/07/embracing-motherhood.com-2.png 400 810 Stacey Maaser https://embracing-motherhood.com/wp-content/uploads/2018/01/EM_Logo.png Stacey Maaser2020-02-19 11:00:452022-10-08 14:05:34#2-How to Engage Your Baby or Young Child with Reading

#3-Learning How to Read Begins with the ABCs

General, Teach Your Child to Read, Teaching
learning to read begins with the abcs

Learning the ABCs lays the foundation for all future reading skills. Memorizing letter names and letter sounds (known as phonemic awareness) at a young age is the BEST way to ensure that children are good readers down the road. Children who know their letter names and sounds automatically will find learning to read fun and easy, but children who struggle to memorize letter names and sounds will find learning to read laborious and difficult. This is something I have seen as both a classroom teacher and as a parent, but don’t just take my word for it.

ABC Flashcards with Jack

ABC Flashcards with Jack

Alphabet Knowledge Predicts Later Reading Ability

The research shows that children who start kindergarten with a strong foundation in their knowledge of the alphabet and early literacy skills will find learning to read to be easy and fun, but students who start off already behind will find learning to read difficult and discouraging.

The findings of Developing Early Literacy Skills: A Meta-Analysis of Alphabet Learning and Instruction (a peer reviewed article at NCBI – US National Library of Medicine National Institutes of Health) show that,

“Children’s knowledge of letter names and sounds is the best predictor of their later reading and spelling abilities,” (Hammill, 2004; Scarborough, 1998; Schatschneider, Fletcher, Francis, Carlson, & Foorman, 2004).

They also point out that,

“Preschool and kindergarten students with poor knowledge of letter names and sounds are more likely to struggle with learning to read and be classified as having reading disabilities,” (Gallagher, Frith, & Snowling, 2000; O’Connor & Jenkins, 1999; Torppa, Poikkeus, Laakso, Eklund, & Lyytinen, 2006).

By creating a language rich environment with lots of opportunities for oral language development, helping children to memorize important vocabulary words, and teaching them letter names and letter sounds, children will have a strong foundation in literacy that will make learning to read easy, natural, and fun!

Age to Start

In my experience, the ideal time to start teaching children the alphabet is between 6-8 months of age. Are you thinking, “Really? Why so young?”

Children’s brains start EXPLODING with growth at 6 months of age. This continues until the age of about 3 when synaptic pruning occurs at a rapid rate. Think “use it or lose it”.

So when you start teaching your child the alphabet at a young age, their brain will put knowledge of the alphabet at the center of its framework and build everything else around it. But if you wait until your child is older, they will have to find a new place to put this information. The best way to commit new information to long term memory after synaptic pruning has begun is to connect it to existing knowledge. If there is no existing knowledge, repetition (especially with movement) is the only way to make sure the new information is stored long term.

What this means is that if you start teaching the ABCs when your child is young, you can teach a little bit over a long period of time, but if you start when they are older, they will require more repetitions and the repetitions need to connect to prior learning whenever possible.

How to Teach the ABCs to Babies and Toddlers

Teaching babies and toddlers the alphabet is easy because they are very interested to learn it. Once you show them what these “symbols” mean, and then they identify them in books, on signs, in the kitchen, and everywhere, they will feel like they can connect to and understand the world around them.

  1. Teach the letter name, letter sound, and word simultaneously. Teaching all three simultaneously shows children how intrinsically linked all three are.
  2. Allow for a silent period. If you start teaching your child the ABCs between 6-8 months of age when they aren’t capable of producing speech, it may take them 6-8 months or until they are able to vocalize what they are learning. This is the silent period of language acquisition where children are observing and taking it all in. (*Note: The silent period is something I learned about in my linguistics classes referring to a child learning a second language, but I have observed it in my own children learning their first language as well.)
  3. Praise any right answer. If your child vocalizes the letter name, sound, or word associated with that letter praise him or her for getting the answer right because each answer is right! This praise will motivate children to continue with more vocalizations.
  4. Watch a variety of ABC videos. I certainly hope that you enjoy my homemade ABC Video, but I highly encourage you to create a playlist on YouTube of your child’s favorite ABC songs.
  5. Fill your house with ABCs. Posters, rugs, magnets, books, toys…you name it, just fill your house and make the ABCs a fun and engaging part of your little one’s day. Listed below I have a section called Additional Resources where I share some of my favorite resources, check out my blog: 10 Best Resources for Teaching the ABCs, and of course check out my teachers pay teachers store for flashcards, videos, and more.
  6. Read lots of ABC books. Go to the library often and pick out a ton of ABC books, find which ones your children enjoy the most, then buy a few sturdy ones to read over and over.
  7. A little bit over a long period of time is best. Don’t worry about teaching the ABCs every day, just try to fit it in a few times a week or even just a few times a month when the timing is right. Wait until your child is happy, in a good mood, and ready to learn. I love using feeding time for teaching. You may find that there are periods where your child wants to learn about the ABCs every single day, but then will completely lose interest for a few months and that’s okay too.

I started teaching Ophelia her ABCs with a crude homemade set of flashcards when she was about 6 months old, and she loved learning her letters! (I’ve since updated them, and they’re available here.)

How to Teach the ABCs to Preschoolers and Older Children

If you wait until your children are older to teach them the alphabet, the knowledge they need to learn will still follow the same progression, it will just need to look different to fit the needs and interests of an older child. Also, starting at the age of 3, synaptic pruning occurs, so if you’re teaching the ABCs to a 4, 5, or 6 year old, they will need many more repetitions to help rewire their brains to make room for this new information.

Because we were in the middle of a lot of life changes when Elliot was young and also due to his personality and not being able to sit still and focus, we didn’t really start using flashcards and videos to teach the ABCs until he was about 3-4 years old. He actually started learning alongside Ophelia when she was first starting to learn at 6-8 months. After about two years of exposure, Elliot started reading at the age of 5. He is currently in the 3rd grade and at the top of his class reading at a 6th grade level!

One of the things he LOVED doing was making ABC books. We would sit at the computer together and find print outs for each letter of the alphabet. He loved it when we would personify the characters and make them talk. 🙂

  1. Play ABC videos in the background. YouTube has many ABC videos geared for older children that feature things like these alphabet transformers and Minecraft characters. Use what your child is interested in to custom make your own ABC playlist. Don’t expect your child to sit and watch the ABC videos with full attention, but if you play them in the background when he or she is quietly playing, you would be surprised how much is absorbed.
  2. Make it physical and fun! Spread ABC flashcards on the floor, pretend the floor is lava, and then jump from one letter to the next (shout the name or sound of the letter as you step on it) going from one part of the room to the next. Make hopscotch letters with sidewalk chalk outside. Place all flashcards upside down on the floor, flip a card over, keep it in a pile if you know it right away, and get a prize for how many cards piled up (small candies or minutes of choice time). Go to Pinterest, use your imagination, and have fun with it!
  3. Use technology. Children can be very motivated to play educational games if you limit screen time. There are many great apps and games for older children who are learning the alphabet that you can find by looking in the app store. Starfall has some amazing resources many of which are free. Check out my blog: Best Teaching Apps for Children 0-6 for some more app ideas.
  4. Read to your child. Many of the simple ABC books will be too babyish for your child, but you can find some great ABC books geared for older children like this Star Wars ABC book and this Superhero ABC book. Also, go to the library often and read piles and piles of books with your child. As you’re reading, you can point out certain words and the letters they start with.
  5. Teach someone younger. If your child has a younger sibling, friend, pet, or even stuffed animal, have your child be the teacher. He or she can use flashcards, videos, and books to help teach their pupil!
  6. Make it kinesthetic and tactile. If your child has the dexterity to start writing letters, this can help to reinforce learning the letter names and sounds. Get a large baking sheet and cover it with shaving cream or sand. Then have your child trace the letter with his or her finger.
  7. Use white boards and dry erase markers. Either write the letters yourself and have your child erase them, or have your child write his or her own letters. You could also do a letter search by writing 5- 10 letters and then have your child try to find the ones you call out. Write-on-wipe-off ABC books are fun too.
  8. Use sign language. When children are a little bit older, they can start manipulating their fingers to make sign language letters. This will be just challenging enough for them to be exciting. Here’s a great video to use!
  9. Separate capital and lowercase letters. Focus on using capital letters for letter names and lowercase letters for letter sounds and spend more time working on letter sounds.
  10. Try to do something every day. Children starting at an older age will need more repetitions and have a shorter amount of time to master letter names and letter sounds before they start to read so try to set aside time as often as you can for learning to occur.

My ABC Flashcards

I created these ABC flashcards because I couldn’t find what I was really looking for anywhere else. Each of my flashcards features the upper and lowercase letter (using my own hand drawn font), a simple and easily identifiable picture, and the word associated with that picture. In addition, the vowels are all short, the /k/ sound is used for the letter c and the /g/ sound is used for the letter g, and there are no confusing digraphs, diphthongs, or r-controlled vowels as you will find in so many other flashcards on the market. I have created these flashcards in a variety of sizes and have many more flashcards and videos on my teachers pay teachers store, so check it out!

ABC Horizontal Flashcards

ABC Horizontal Flashcards

abc video featured image

  • ABC Flashcards (4 per page)
  • ABC Flashcards (2 per page) – These are my favorite!
  • ABC Flashcards (1 per page) – These are great to put around the ceiling especially near the diaper changing table.
  • Black and White ABC Flashcards (4 per page) – Have fun coloring your own set!
  • Black and White ABC Flashcards (1 per page) – These would be fun for preschool age children to color.
  • ABC Poster
  • ABC Video

Materials to Make My Flashcards

You can certainly just print these flashcards out on card stock and use them as is, but babies love to chew on things, and laminating them and putting them together with some rings will ensure their durability. *Before and after laminating, I cut the corners so they are rounded. 

  • Printer – A good basic printer like this will do the job, but if you’re going to be doing a lot of printing, I would recommend something like this.
  • Card Stock – I like to make sure I always have plenty of this around for all of my flashcards, posters, and other needs.
  • Laminating Sheets – I like having this in stock at all times because not only is it great for laminating flashcards, but for making favorite things books and saving favorite pieces of art work.
  • Laminator – I have a basic laminator like this, and it works great for all types of paper and projects. When laminating, you want to leave at least an eighth of an inch of laminate around the edges so it won’t peel.
  • Paper Cutter – You will LOVE having this around for cutting school pictures and so much more, but it’s great at cutting 4-5 pieces of card stock and 3-4 stacks of laminated card stock.
  • Three Hole Punch – This hole punch is really sturdy and can handle a whole stack of paper. I like angling my flashcards so I get right in the center of each of the top corners.
  • 1/2 Inch Loose Leaf Rings – When making flashcards, I have found it’s best to use two rings on top to keep everything organized and easy to flip through, and this size is best.

Additional Resources

In addition to my homemade resources, these are the things I have purchased that have made a HUGE impact on my children’s learning. I recommend the first three at least as MUST HAVES. If you use these resources often, your child will learn the ABCs so fast it will make your head spin! (Check out my blog: 10 Best Resources for Teaching the ABCs for a more detailed and comprehensive list with pictures.)

    • *Preschool Prep – This company makes REMARKABLE videos and I HIGHLY recommend purchasing the whole pack. They have a wonderful letter name video and a letter sound video that is highly engaging for little ones and really enforces learning all of the letter names and letter sounds.
    • *ABC Bath Letters – Making the letters a toy is a great idea! During bath time you can talk to your little ones about letter names and letter sounds in a fun and silly way. (For example, “Look at my dancing A, she likes to stand on my head!”)
  • *Starfall – This amazing online resource has everything you need to teach your child pretty much everything he or she needs to learn pertaining to reading and math through grade 2. I love starting out with the interactive ABCs that are great for teaching letter names, letter sounds, and vocabulary. This part is free, the rest of the site is $35/year, and SOOOOOOOOO worth it. Here’s a video of Ophelia using Starfall. They also have numerous apps.
  • Leapfrog Fridge Magnet Set – This is great for children starting at about 12-18 months, or whenever they are walking and developing fine motor skills.
  • Alphabet Apple – This a fun way for young children to reinforce learning the letter names and sounds in a way that makes them feel like they have their own computer.
  • Robot Letters – If you are teaching an older child the ABCs, especially one who likes robots and transformers, this is a great resource!
  • Dr. Suess’s ABC – This book has been an absolute favorite with each of our kids (probably because I love it so much). Find whatever ABC books YOU love to read, like Chica Chica Boom Boom, Elmo’s ABC Book, this textured ABC Alphabet Fun book, Sandra Boynton’s A to Z, The Alphabet Book, or anything else you can find at garage sales, thrift stores, and hand-me-downs.
  • Endless Alphabet App – I would say that this app is best for children 2 and older and is a GREAT way to reinforce letter names and sounds.
  • Storybots – My kids LOVE these videos! They are great for older children and reinforcing letter names and words that start with that letter. They have a great ABC app and tons of other great learning videos.

*Consonants with More Than One Sound Flashcards

I originally included these flashcards in my blog #7-Unlock the Final Stages of Reading with Advanced Phonemic Awareness, but I thought it would be helpful to include them here as well in case your child was ready earlier. I find that the best time to talk to children about consonants that make other sounds is when they are curious or when they make a mistake. For example, if you ask your child what sound the letter c makes, and they say /s/ as in “circus” instead of the common sound of /k/ as in “cat”, you can say, “Yes, the letter c can make the /s/ sound as in circus, but usually it will make the /k/ sound as in cat. That’s why we call it a copycat letter. It actually doesn’t make its own sound but either borrows the /k/ sound or the /s/ sound.” Click here to visit my teachers pay teachers store for this resource and more.

Consonants with More Than One Sound Flashcards

Consonants with More Than One Sound Flashcards

In Conclusion

Teaching your children the ABCs (especially at a young age) is one of the best gifts you can give to them. In doing so, they will have a solid foundation in the skill of reading which will make it that much easier to develop a love of reading. Children who love reading can access the entire world, they can follow their passions independently, and they can be free to unlock the doors to any destiny they desire.

Ophelia and Julian Reading Books

Ophelia and Julian Reading Books

For More Information

You’ll find everything you need to teach your child to read at my teachers pay teachers store which includes flashcards, videos, posters, and more.

How to Teach Your Child to Read in 5 Simple Steps (Keeping it Simple)

  1. Language Rich Environment: Use oral language at the child’s level (Get down on the floor and play together!) and help them memorize vocabulary words. (Tell them the names of things!)
  2. Phonemic Awareness: Teach one sound for each letter of the alphabet. (Start with short vowels.)
  3. Phonics: Tap out sounds in three letter words to teach how sounds come together to make words.
  4. More Complex Phonemic Awareness: Introduce long vowels, digraphs, other vowel sounds, and complex consonants.
  5. Reading Comprehension Strategies: Use quality literature to interact with books and ask questions before, during, and after reading to make sure your child is understanding what is being read.

Teach Your Child to Read Blog Series (Digging Deeper)

  • #1-Oral Language Development Lays the Foundation for Reading
  • #2-How Engage Your Baby or Young Child with Reading
  • #3-Learning How to Read Begins with the ABCs
  • #4-Memorizing Words (Before Sounding Them Out) Leads to Reading
  • #5-Building Vocabulary with Numbers, Colors, and Shapes
  • #6-Teaching Phonics with Three Letter Word Families
  • #7-Unlock the Final Stages of Reading with Advanced Phonemic Awareness
  • #8-Reading Comprehension Strategies Lead to Independent Readers
  • #9-Reinforcing Reading with Writing
February 18, 2020/by Stacey Maaser
https://embracing-motherhood.com/wp-content/uploads/2020/02/learning-to-read-begins-with-the-abcs.png 400 810 Stacey Maaser https://embracing-motherhood.com/wp-content/uploads/2018/01/EM_Logo.png Stacey Maaser2020-02-18 11:00:542022-10-08 10:26:00#3-Learning How to Read Begins with the ABCs

#4-Memorizing Words (Before Sounding Them Out) Leads to Reading

General, Teach Your Child to Read, Teaching
memorizing words is what good readers do

While teaching my own five children how to read, I have discovered that memorizing words before learning how to sound them out is a HUGE (and often overlooked) part of learning how to read.

When children memorize words, they learn that letters come together to form words and that these words have meaning.

Elliot and Ophelia Exploring My Homemade Flashcards

Elliot and Ophelia Exploring My Homemade Flashcards

How I Discovered the Importance of Memorizing Words

When my daughter Ruby (my first of five) was 6 months old, I started showing her the Your Baby Can Read videos (They are now called Your Baby Can Learn because people got mad about the claims that babies could read and so they had to rebrand themselves). They were simple, engaging, and effective. While watching the videos together, she was always engaged, but she never vocalized anything until after about 10 months. (This is the silent period of language acquisition where children are little sponges taking everything in, but not yet speaking.)

Then at about 12-14 months old, she expressed an explosion of language! She started out by saying the beginning sounds of the words and eventually words by the dozen. By the time she was 15 months old, I would write down words from the video and she would read them! Then I started adding more words pertaining to things she liked: cat, walk, moon, mom, dad, Ruby, etc. and after repeated exposure, she would read those too.

People who saw her do this would be blown away, but they would say, “She’s not reading those words, she just memorized them.” And I would say,

“YES, MEMORIZING WORDS IS A PART OF READING!!!”

We are so trained to think that words need to be sounded out, and yes, that is a part of reading too, but once a word has been sounded out over and over again, it becomes MEMORIZED.

Ruby Loves Reading

Ruby Loves Reading

Age to Start

The ideal time to start teaching children to memorize words is between 6-10 months of age and ideally before a child is 3. (If your child is older than 3, don’t worry! He or she will follow the same progression just with certain modifications.)  At 6-10 months of age, neurons in the brain start to form connections that will lay the foundation for how the brain is organized. By the time children are 2-3 years old, they have more neurons than they will ever have in their entire lives. After this, synaptic pruning occurs as the brain becomes more specialized based on the child’s environment.

Reading with Julian

Reading with Julian

First Words Flashcards

I selected words for my flashcards that would be useful for a baby or young child to know. Words like clap, wave, hug, and kiss are actions that little ones like to perform. Simple nouns like ball, cup, cat, and dog are things that young children are likely to be familiar with and see in their every day environments. I also included these same words with suffixes so that children can build an understanding from a young age that words with suffixes may look different but still carry the same core meaning.

The words for the flashcards are written in a font that I personally created. First of all, I wanted to create a font that is representative of how we teach children to write. I also wanted to be able to fill in my letters with simple bold colors that would create a pleasing image.

I purposefully do not include images with these words because I want children to memorize the shape of the word as if it were an image itself. By showing children the video along with the flashcards, they will learn what the words mean while still keeping the focus on the shape of the word.

First Words Resources

I chose simple words that use some sort of action and purposefully didn’t include a picture so that children will learn to memorize just the word. When children are learning about letter names and sounds, it’s important for them to see that these letters and sounds come together to form words and that these words have meaning. Yes, they are getting that concept with the word from the flashcard, but using these first words resources really reinforces that concept.

words flashcards rectangle

  • First Words Flashcards (4 per page)
  • First Words Flashcards (2 per page)
  • First Words Poster
  • First Words Video

Materials to Make My Flashcards

You can certainly just print these flashcards out on card stock and use them as is, but babies love to chew on things, and laminating them and putting them together with some rings will ensure their durability. *Before and after laminating, I cut the corners so they are rounded. 

  • Printer – A good basic printer like this will do the job, but if you’re going to be doing a lot of printing, I would recommend something like this.
  • Card Stock – I like to make sure I always have plenty of this around for all of my flashcards, posters, and other needs.
  • Laminating Sheets – I like having this in stock at all times because not only is it great for laminating flashcards, but for making favorite things books and saving favorite pieces of art work.
  • Laminator – I have a basic laminator like this, and it works great for all types of paper and projects. When laminating, you want to leave at least an eighth of an inch of laminate around the edges so it won’t peel.
  • Paper Cutter – You will LOVE having this around for cutting school pictures and so much more, but it’s great at cutting 4-5 pieces of card stock and 3-4 stacks of laminated card stock.
  • Three Hole Punch – This hole punch is really sturdy and can handle a whole stack of paper. I like angling my flashcards so I get right in the center of each of the top corners.
  • 1/2 Inch Loose Leaf Rings – When making flashcards, I have found it’s best to use two rings on top to keep everything organized and easy to flip through, and this size is best.

First Words Video

I highly recommend printing out my flashcards to use while watching my First Words Video. In the video, I repeat each word three times and allow pauses so that children can have a chance to say each word the second and third time. After each word, I have video clips showing my children acting out the meaning of each of the words. The video is 30 minutes long and and loops through all of the words three times with videos of my children singing a song inbetween sets.

First Words Video

First Words Video

How to Teach Your Baby or Toddler

I recommend starting to use these resources when your child is between 6-10 months of age and to do so while they are learning their ABCs. You will see the most dramatic amount of growth if you can start before the age of 1, and by the age of 3 at the very latest.

  1. Start with the video first. I have found that the best time to show the Words Video is while my children are eating. As you show your child the video initially, he or she might not show a tremendous amount of focus and attention, but as the video becomes familiar, you will notice it holding your child’s attention for longer periods of time.
  2. Add the flashcards. After your child is familiar with the video, start introducing the flashcards. Try to get through as many as you can but don’t force it. You may find that your child has favorite words and it’s okay to only include those favorite flashcards in the pack.
  3. A little bit over a long period of time is best. Don’t try to cram everything into one day creating the “perfect lesson”. Doing a little bit over a long period of time is the best way to get something committed to long term memory. Keep little baskets around your house with flashcards so that when the moment is just right, they’re easy to grab.
  4. Show the flashcards while watching the video. Once your child is familiar with the words and video, use them together!
  5. Use wait time. In my video I ask, “Can you say____?” and “What does this say?” After each question, I pause to give children a chance to say the word. When you do this with your child using the flashcards, make sure you allow just the right amount of wait time. If the pause becomes really long, just say the word and move on.
  6. Point out these words in daily life. Remember some of your child’s favorite words and use them often during the day. Words like kiss, clap, wave, and ball should be easy to incorporate throughout the day.

How to Teach Preschoolers and Older Children

If you have children are 4+, and you haven’t started to teach them how to read yet, don’t fret! It is still possible to use these resources to teach children them how to read. The approach will just need to be a bit different and focus on more engaging and hands on activities in order to make it interesting and appealing.

  1. Have the video on in the background. An older child may not be as motivated to sit down and watch this entire video, but you can play it in the background while they are playing. Wait until your children are building with legos, doing puzzles, or drawing, and then have this video on in the background so they can at least hear it. You may find them pausing their play to watch the video here and there and that’s perfectly fine. You could also have it on during meal time.
  2. Teach a younger sibling, friend, or even stuffed animal. If you’re teaching your one year old and your four year old at the same time, you can pretend like both you and the four year old are really just teaching the one year old. You could also pretend that you’re teaching a stuffed animal who doesn’t know how to read words.
  3. Write and wipe. Kids LOVE using dry erase boards and markers. You can write the word and have them erase it, of have them copy the word from the flashcards and write it down.
  4. Flashcards timed. Show your child the flashcards repeatedly until he or she can say most words correctly. Then time a first read through, making sure it’s nice and slow. This will motivate the child to beat his or her original time.
  5. Loose cards and pocket chart. Take the flashcards off from the rings and hand one card at a time to your child. Have them place the cards into the pocket chart while trying to sort them in some way (by color, by type of word…is it an action? verb or is it a thing? noun)
  6. I spy. Spread all of the cards out on the floor and say, “I spy with my little eye a yellow word that starts with the letter c.” If they don’t get it, give another clue by acting out the word (like clapping your hands for clap) or giving another clue (like meowing for cat). They can either gather the words they find in a pile or put them in the pocket chart.
  7. Make a Path. You can spread out the words in a long line in any order. Then pretend that the floor is lava and tell your child that the words are stones that will save him or her from the lava. As he or she hops from word to word ask him or her, “What word are you on now?” or “What word will you be stepping on next.”
  8. Charades. Hold the flashcards away from you so you can’t see the word but your child can. Then tell your child that he or she must act out the word and you will have to guess it. You can make a rule that words can’t be used but sounds can. And of course they can use props from around the house or even draw a picture!
  9. Point out words while reading. The best way to teach children how to memorize words is by reading quality literature. You’ll notice that your child may have favorite words that you can point out while reading. Feel free to make your own set up flashcards based on your child’s individual favorite words.

Additional Resources

Children will memorize words that they see over and over and over again. This is best done through repeated reading. Here are some of the books I have enjoyed reading repeatedly with my little ones. I like making reading part of my routines like going to bed, morning reading, and reading before rest time.

Ophelia LOVES Reading!

Ophelia LOVES Reading!

Words Books

  • Baby’s First Words – I LOVE how this book is thick, has a sturdy puffy cover, and has simple images surrounded by white with one word below to describe it. This is great for building vocabulary and teaching children new words. The Hinkler company is amazing and everything they make is great.
  • First 100 Words – This book has an array of boxes on a page with many pictures with a word underneath falling into a variety of different categories. It’s a great tool for teaching the names of things.
  • Let’s Talk – Children will love pressing the buttons that make sounds for the corresponding pictures. It’s a great way to bring these basic words to life.
  • Tails – This is one of my favorite books of all time. It is SUPER sturdy and every page is brightly colored, flashy, and has some sort of movement you can facilitate. What a great way to teach words! There’s also a similar book called Heads that is equally amazing.
  • Bard’s Rhyme Time – Finding books with a rhyming pattern makes figuring out the last word super easy. I love the flaps in this book and pausing before the last word to give my little one a chance to say it.

Bedtime/Morning Time Books

  • Pajama Time – Anything by Sandra Boynton is great for babies. I love turning this book into a little song. All of our kids have LOVED this as part of their bedtime routine.
  • The Going to Bed Book – This is another Boynton book and another family favorite.
  • Maisy Goes to Bed – This book is interactive and very cute. There is also a Maisy cartoon show which helps little ones to become even more familiar with the books.
  • Bedtime Peekaboo! – This board book is very short and simple with pages that fold out. I love reading it at night with my little ones.
  • 10 Minutes till Bedtime – This is another all time favorite book. There is minimal text, but so many details to point out in the pictures that make it a different experience every time we read it.
  • Hey! Wake Up! – This Sandra Boynton book makes a great morning routine with it’s cute characters and rhyming text.

Sight Word Videos

I love how these videos personify each word by making it come to life and act out the meaning of the word, which is the most important part. Get the entire collection of Preschool Prep videos here (I can’t recommend these enough!).

  • Meet the Sight Words 1
  • Meet the Sight Words 2
  • Meet the Sight Words 3

In Conclusion

Memorizing words is a very important part in the first stages of reading because children need to see that letters are used to make words and that words convey meaning. In addition, memorizing words is a much bigger part of reading than people think. Once children memorize the first set of words from my flashcards and video, they will be ready to memorize additional words and “read them” in the context of quality literature.

If you read rhyming text, do repeated reading with the same books over and over, point to words occasionally as you’re reading with your child, pause to let them fill in the words they know while pointing to them, and make reading fun and part of your daily routines – your child will memorize words and be on their way to independent reading!

For More Information

You’ll find everything you need to teach your child to read at my teachers pay teachers store which includes flashcards, videos, posters, and more.

How to Teach Your Child to Read in 5 Simple Steps (Keeping it Simple)

  1. Language Rich Environment: Use oral language at the child’s level (Get down on the floor and play together!) and help them memorize vocabulary words. (Tell them the names of things!)
  2. Phonemic Awareness: Teach one sound for each letter of the alphabet. (Start with short vowels.)
  3. Phonics: Tap out sounds in three letter words to teach how sounds come together to make words.
  4. More Complex Phonemic Awareness: Introduce long vowels, digraphs, other vowel sounds, and complex consonant sounds.
  5. Reading Comprehension Strategies: Use quality literature to interact with books and ask questions before, during, and after reading to make sure your child is understanding what is being read.

Teach Your Child to Read Blog Series (Digging Deeper)

  • #1-Oral Language Development Lays the Foundation for Reading
  • #2-How Engage Your Baby or Young Child with Reading
  • #3-Learning How to Read Begins with the ABCs
  • #4-Memorizing Words (Before Sounding Them Out) Leads to Reading
  • #5-Building Vocabulary with Numbers, Colors, and Shapes
  • #6-Teaching Phonics with Three Letter Word Families
  • #7-Unlock the Final Stages of Reading with Advanced Phonemic Awareness
  • #8-Reading Comprehension Strategies Lead to Independent Readers
  • #9-Reinforcing Reading with Writing
February 17, 2020/by Stacey Maaser
https://embracing-motherhood.com/wp-content/uploads/2017/07/memorizing-words-is-what-good-readers-do.png 400 810 Stacey Maaser https://embracing-motherhood.com/wp-content/uploads/2018/01/EM_Logo.png Stacey Maaser2020-02-17 11:00:142022-10-08 14:05:30#4-Memorizing Words (Before Sounding Them Out) Leads to Reading

#5-Building Vocabulary with Numbers, Colors, and Shapes

General, Teach Your Child to Read, Teaching
Building Vocabulary with Colors, Numbers, and Shapes (Part 4 in a Teach Your Child to Read Series)

By teaching children numbers, colors, and shapes, it will give them the basic vocabulary to start understanding written text and lay the foundation for learning how to read. Reading isn’t just sounding out letters on a page, it is about finding meaning in written words. I have chosen to focus my initial vocabulary development on these categories because numbers, colors, and shapes are EVERYWHERE in a child’s environment.

Age to Start

The ideal time to start teaching children about numbers, colors, and shapes is between 8-12 months of age. At this time, the neurons in their brains are exploding with growth! But if you don’t start until your child is older, that’s okay too! Just start with wherever you are.

How to Teach

The way something becomes committed to long term memory is consistent repetition over a long period of time. The reason I love starting to teach my children how to read when they are super young is that it really doesn’t take much effort at all. By spending a few minutes here and there throughout the day teaching your child about numbers, colors, and shapes, after about 6-8 months, they should know them really well.

I like keeping several sets of my flashcards around the house and incorporate them into my daily routines. When my little ones start eating solid food, I find that this is a great time to watch videos and do flashcards. I love using  the videos on KidsTV123 and Busy Beavers to teach numbers, colors, and shapes. I also link to several other resources at the end of this article that will make teaching fun and easy.

Ophelia Counting Bears in a Mini Muffin Tin

Ophelia Counting Bears in a Mini Muffin Tin

Numbers Flashcards

Learning that one object represents one thing (one to one principal) is the KEY to understanding all future math. When using these numbers flashcards, practice pointing to each object as you count them.

Numbers Flashcards

Numbers Flashcards

These numbers flashcards only go to ten, but I HIGHLY recommend going as high as your child’s attention span allows. Once children reach 10, go to 20, then 100. Have them practice counting by 2s, 5s, and 10s and talk about even and odd as well. This will help them to really excel in math as they get older.

  • Numbers Flashcards (4 per page)
  • Numbers Flashcards (2 per page)
  • Numbers Poster

Numbers Video

This 12 minute numbers video uses shapes, words, and images from my flashcards in conjunction with live video footage of my children showing different examples and talking about the attributes of each shape.

Numbers Video

Numbers Video

Additional Numbers Resources

  • Meet the Numbers – This DVD is absolutely AMAZING at helping children to learn numbers. The images are simple, engaging, effective, and will hold your little one’s attention.
  • Ten Little Ladybugs – The raised ladybugs and the holes in the pages make it irresistible for little fingers. The rhyming text makes it very predictable to say the next number
  • First Numbers – Of all the number books we have in the house, this has been a favorite with every single one of our children. I love how it uses interesting images for each number and how it also shows larger numbers like 20, 50, and 100.
  • Magnetic Numbers – These magnetic numbers are a great way to teach numbers using a hands on resource. You can put them on your fridge or use a magnetic white board with these.
  • 1-100 Numbers Poster – My kids LOVE this poster! It’s a great tool to teach children numbers up to 100. Make sure to hang it at their eye level.
  • Counting Car – This counting car from Lakeshore Learning is a GREAT way to teach children how to count.
  • Number Robots – This is for more for an older child, and is a great resource for reinforcing number with transforming robots.
  • Number Peg Boards – Peg boards are super fun as is, and these peg boards are a great way to learn about numbers and counting.
  • Learn Numbers with Little Red Penguin – Little ones will love this cute board book where they lift the flaps to learn about numbers 1-10.
  • 123 Counting – Designed for babies, this fold out/stand up book has high-contrast black and white images and patterns that are easily recognizable for babies.
  • Usborne Very First 1 2 3 – This book only goes up to number five, but is a great introduction for little ones to numbers.
  • Count to 100 – I LOVE this book! Teaching children to count to 10 is great, but showing them what 100 means is AMAZING!
  • How Big is a Million? – Showing young children the concept of one million is phenomenal, and this cute book with a penguin does a wonderful job! It also comes with a poster.
  • First Numbers Sticker Book – This would be a resource for a bit of an older child to use independently. Using stickers is a great way to reinforce skills.

Colors Flashcards

Colors are a very easy attribute that children can readily recognize. As children are developing their vocabulary, describing the colors of things is a very easy thing for them to do that will build their confidence in language development. When children are familiar with the color words, start asking them what things are that color. “What things are red?” When children are holding an object, ask them what color it is. If they don’t know or say the wrong thing, tell them right away what it is.

Colors Flashcards

Colors Flashcards

These colors flashcards cover the basic colors that children will encounter in their environment. Once your child has mastered these colors, I definitely recommend teaching more. Using crayon labels is a great way to learn the names of more colors!

  • Colors Flashcards (4 per page)
  • Colors Flashcards (2 per page)
  • Colors Flashcards (1 per page)
  • Colors Poster

Colors Video

This 11 minute colors video uses colors, words, and images from my flashcards in conjunction with live video footage of my children showing different examples and talking about each color.

Colors Video

Colors Video

Additional Colors Resources

  • Meet the Colors – This DVD is absolutely AMAZING at helping children to learn colors. The images are simple, engaging, effective, and will hold your little ones attention.
  • Flaptastic Colors – This is the type of book you’ll want to have multiple copies of around the house! It is great for teaching little ones about colors and the interactive nature and extensive examples make it very engaging.
  • Curious Kittens: A Colors Book – The yarn that runs across each page is a true delight for babies to play with and a great way to learn colors.
  • My First Sorting Bears – Children can sort these cute little bears onto the color mats. I’m sure that children will like playing imagination games with these critters too!
  • Color Discovery Boxes – These color boxes come with a bunch of really cool objects that can be sorted by color.

Shapes Flashcards

Learning about shapes lays the foundation for geometry. First, children should learn the names of the shapes and then they can learn about their attributes. Once children are familiar with the names of the shapes, you can start talking about their attributes by asking questions like: How many sides does this shape have? Are all of the sides equal in length? How many corners (vertices) are there? Are the sides across from each other going the same way (parallel)? Do you see any right angles?

Shapes Flashcards

Shapes Flashcards

These shapes flashcards cover the basic shapes that children will encounter at a young age. Yes, there are sooooooo many more shapes to learn, and you should talk to your child about those once they master these, but these shapes are a GREAT place to start. The National Library of Virtual Manipulatives is a great resource for young children who are ready to learn more. Just check out their geometry section.

  • Shapes Flashcards (4 per page)
  • Shapes (2 per page)
  • Shapes Flashcards (1 per page)
  • Shapes Poster

Shapes Video

This 16 minute shapes video uses shapes, words, and images from my flashcards in conjunction with live video footage of my children showing different examples and talking about the attributes of each shape.

Shapes Video

Shapes Video

Additional Shapes Resources

  • Meet the Shapes – This DVD is absolutely AMAZING at helping children to learn colors. The images are simple, engaging, effective, and will hold your little ones attention.
  • Shape by Shape – This book uses die-cut shapes to teach basic shapes like a triangle, crescent, semicircle, oval, and diamond by posing a simple question, “Do you know who I am?” Each page is vibrant with a minimal amount of text that allows the focus to be on the shape.
  • My Very First Book of Shapes (by Eric Carl) – This book uses Eric Carl’s chunky painting style to teach shapes if a very bright and colorful way.
  • Shape Sorting Center – Children can sort real life examples of shapes on to these shape sorting mats.
  • Pattern Blocks – Not only will children love playing with these shapes making beautiful patterns, but they will learn about shapes and their attributes through play.
  • 3-D Geometric Shapes Tub – These colorful solid plastic shapes are a fun hands-on way for children to learn about 3-D shapes.
  • Learn Shapes with Little Red Penguin – Little ones will love this cute board book while they lift the flaps to learn about shapes.
  • Lift the Flap Shapes – This bright lift the flap book gives children lots of practice naming basic shapes in a fun and engaging way.

Materials to Make My Flashcards

You can certainly just print these flashcards out on card stock and use them as is, but babies love to chew on things, and laminating them and putting them together with some rings will ensure their durability. *Before and after laminating, I cut the corners so they are rounded. 

  • Printer – A good basic printer like this will do the job, but if you’re going to be doing a lot of printing, I would recommend something like this.
  • Card Stock – I like to make sure I always have plenty of this around for all of my flashcards, posters, and other needs.
  • Laminating Sheets – I like having this in stock at all times because not only is it great for laminating flashcards, but for making favorite things books and saving favorite pieces of art work.
  • Laminator – I have a basic laminator like this, and it works great for all types of paper and projects. When laminating, you want to leave at least an eighth of an inch of laminate around the edges so it won’t peel.
  • Paper Cutter – You will LOVE having this around for cutting school pictures and so much more, but it’s great at cutting 4-5 pieces of card stock and 3-4 stacks of laminated card stock.
  • Three Hole Punch – This hole punch is really sturdy and can handle a whole stack of paper. I like angling my flashcards so I get right in the center of each of the top corners.
  • 1/2 Inch Loose Leaf Rings – When making flashcards, I have found it’s best to use two rings on top to keep everything organized and easy to flip through, and this size is best.

In Conclusion

Oral language development is tied into reading more than people would think. As children interact with their environment, they need a guide (you) to help them provide them with the names of everything and to explain the world they are just learning about. Teaching numbers, colors, and shapes will give children some really basic descriptors that will help immensely with oral language development and will build background knowledge to create strong readers.

Reading with Ruby and Elliot

Reading with Ruby and Elliot

For More Information

You’ll find everything you need to teach your child to read at my teacher’s pay teacher’s store which includes flashcards, videos, posters, and more.

How to Teach Your Child to Read in 5 Simple Steps (Keeping it Simple)

  1. Language Rich Environment: Use oral language at the child’s level (Get down on the floor and play together!) and help them memorize vocabulary words. (Tell them the names of things!)
  2. Phonemic Awareness: Teach one sound for each letter of the alphabet. (Start with short vowels.)
  3. Phonics: Tap out sounds in three letter words to teach how sounds come together to make words.
  4. More Complex Phonemic Awareness: Introduce long vowels, digraphs, other vowel sounds, and complex consonants.
  5. Reading Comprehension Strategies: Use quality literature to interact with books and ask questions before, during, and after reading to make sure your child is understanding what is being read.

Teach Your Child to Read Blog Series (Digging Deeper)

  • #1-Oral Language Development Lays the Foundation for Reading
  • #2-How Engage Your Baby or Young Child with Reading
  • #3-Learning How to Read Begins with the ABCs
  • #4-Memorizing Words (Before Sounding Them Out) Leads to Reading
  • #5-Building Vocabulary with Numbers, Colors, and Shapes
  • #6-Teaching Phonics with Three Letter Word Families
  • #7-Unlock the Final Stages of Reading with Advanced Phonemic Awareness
  • #8-Reading Comprehension Strategies Lead to Independent Readers
  • #9-Reinforcing Reading with Writing
February 16, 2020/by Stacey Maaser
https://embracing-motherhood.com/wp-content/uploads/2017/05/building-vocabulary-1.png 400 810 Stacey Maaser https://embracing-motherhood.com/wp-content/uploads/2018/01/EM_Logo.png Stacey Maaser2020-02-16 11:00:122024-06-06 14:24:43#5-Building Vocabulary with Numbers, Colors, and Shapes

The Importance of Learning the ABCs

General, Reading, Teaching

Learning the ABCs is something so intrinsic to childhood that as adults, we might hardly recognize the importance, but learning the ABCs is more than just singing a song, it’s understanding that each letter has a name, each letter makes a sound, and that these sounds come together to make words. Having a strong understanding of this concept at a young age will make learning how to read seem to happen “as if by chance” (which is how Finnish children typically learn to read).

What Does It Mean to Learn the ABCs?

  1. Letter Names: Learning the names of the 26 letters is pretty basic and straightforward. When children learn what each letter is called, it paves the way for learning the sounds that the letters make.
  2. Letter Sounds: Learning the sounds that the letters make is a bit more complex…probably due to the fact that our 26 letters actually make 44 different sounds. Knowing the different sounds that the letters make is called phonemic awareness.
  3. Letters Come Together to Make Words: Before children start putting letters together to make words, they need to understand that words represent something…a person, action, thing, idea, etc. Then, they learn that the letters “c”, “a”, and “t” can be sounded out as /c/-/a/-/t/ to make the word “cat” and this is the gateway to reading. This is what is known as phonics.
  4. Writing Letters: I often hear of children learning how to write their letters at the same time they are learning letter names and sounds, and I believe that these are two very different skills that should not be taught simultaneously (unless the window for learning has been missed, and there are no other options). Learning how to write letters requires an advanced level of fine motor skills that children do not typically possess until about 4 or 5 years of age, but learning the letter names and sounds is something that can begin as young as 6-8 months of age.

How Children Really Learn How to Read

There is a misconception in the United States (and other countries too) that children are not ready to learn how to read until they begin formal schooling. The U.S. Department of Education actually supports the notion that Louisa C. Moats coined in 1999 that,

“Teaching reading is rocket science.”

They go on to explain that,

“Becoming a reader is not a natural process, but requires direct and explicit instruction.”

This type of rhetoric perpetuates the stereotype that only qualified professionals are equipped to teach children such a complicated skill as reading. And while yes, teaching the letter names, sounds, and simple phonics does require a wee bit of direct and explicit instruction, it mostly occurs naturally when a learning environment is created that encourages the teaching of these skills.

If you look at the way they do things over in Finland (which boasts some of the highest reading scores in the world), you’ll see that children there are immersed in reading skills from a very young age and learn how to read “as if by chance”. (Read more about the differences in the U.S. and Finland’s educational system here in my blog: 15 Reasons Why Schools in Finland are Performing Better Than Schools in the United States).

In my blog, How Children Really Learn to Read..in 10 Steps, I explore the true progression that occurs when a child learns how to read based on what I’ve learned during my seven years as an elementary classroom educator and ESL teaching coach, throughout the acquisition of my Master’s degree centered around language acquisition, and from raising our four children who have all learned their ABCs from a very young age and then went on to read “as if by chance”.

Basically, learning how to read is about acquiring a battery of skills that starts at birth. It begins with feeling safe and loved and having all basic needs met, then it progresses into vocabulary development in a language rich environment that includes lots of songs, nursery rhymes, and repetitive reading, after that children need a solid foundation in letter names, sounds, an understanding that words have meaning, and explicit guidance to see how letters come together to form words. It then all culminates with a massive amount of word memorization that occurs almost effortlessly when a love of reading is nurtured and allowed to grow.

Brain Development

In my article, “How Children’s Brains are Wired for Learning“, I explain in depth how children’s brains are wired to learn A LOT from a VERY young age. If you look at graphics like this one and this one that show the number of neurons and synaptic connections in between neurons, you’ll see that there is an EXPLOSION of connections beginning at about 6 months, culminating at an unprecedented height between the ages of 2-3, and then dwindling beginning at the age 4 when synaptic pruning occurs. During this process, the connections that are used become reinforced and the connections that are not used go away.

What does this have to do with the ABCs? When children begin learning about the ABCs at a very young age (like 6-8 months), the brain learns that this is something VERY IMPORTANT, something that needs to be reinforced, and something that will be used to help lay the foundation for all further connections that will be made in the brain.

Understanding the letter names and sounds from a young age is absolutely crucial to being able to sound out new words and add them to the memory bank of words. When this knowledge is solidified at a very young age, it makes learning how to read happen “as if by chance”.

Research Supports Early Learning of the ABCs

In every bit of research I have ever studied about early literacy, there is insurmountable evidence that a strong foundation in phonemic awareness produces amazing results. Take a look at this meta analysis of 71 intervention control groups in studies reporting post test and follow up data looking at the long term effects of phonemic awareness, phonics, fluency, and reading comprehension interventions. What they found is that,

“Comprehension and phonemic awareness interventions showed good maintenance of effect that transferred to nontargeted skills, whereas phonics and fluency interventions…tended not to.”

This reinforces the fact that learning phonemic awareness (the letter sounds) in conjunction with comprehension (so not just isolated phonemic awareness drills, but phonemic awareness in the context of learning say, vocabulary) is extremely important and WAY MORE so than phonics and fluency.

The National Institute of Child Health and Human Development (NICHD) research has studied 10,000 children over the past 15 years and found that the one of the main reasons why children struggle with reading comes down to their inability to do one simple thing, and that is to connect letter names to letter sounds. The research shows that children need to be explicitly taught the letter names, the letter sounds, and how to decode words, and that these are not skills that children will just “figure out” on their own with exposure.

The bottom line is that it is MUCH easier for children to learn things correctly the first time around. According to the research in “Learning to Read: A Call from Research to Action” by G. Reid Lyon, Ph.D 85-90% of all reading disabilities can be corrected if early intervention occurs (like in kindergarten). But unfortunately, many kids don’t become identified as having a reading disability or being behind in reading until they are 9 years old and by then, their brains aren’t as ready to accept new pathways of learning, and only 25% will be able to reach average reading levels with interventions.

The biggest disservice we are doing for children is that we are waiting WAY too long to teach them reading skills in the first place. If we can start to build the foundation for reading as parents when our children are young, then we won’t have to wait until it might be too late.

Observations with My Own Children

When our first daughter was born, being an educator, I naturally had great plans to stimulate her mind and help her grow, but after using portions of Your Baby Can Read and teaching her letter names and letter sounds I have been continuously BLOWN AWAY by all that she can do. When she knew all of her letters at 15 months, I was astounded, when she was reading words (that she memorized) well before the age of 2, I was blown away, and when she was full on able to read at the age of 4. Now, at the ripe old age of 6, she absolutely loves reading chapter books. (See more videos of all of our children learning how to read here.)

With all four of our children, we have taught them the letter names and letter sounds from a very young age (starting at about 8 months). At the same time, we have used repetitive reading and my own videos teaching vocabulary and the concept that words have meaning. After we taught my three older ones (now ages 3, 5, and 6) how to decode simple three letter words and continued reading to them regularly, we noticed that they all started to read (each in their own good time) “as if by chance”.

In Conclusion

By teaching children the ABCs from a young age, not only will they enjoy it and be entertained by the challenge, but they will move into the next phase of learning how to read with such strength, confidence, and ease without any of the challenges that come from not knowing the letter names, sounds, or how they work together. Check out my free reading resources for flashcard and video digital downloads to help you teach your child to read.

August 4, 2016/by Stacey Maaser
https://embracing-motherhood.com/wp-content/uploads/2016/07/the-importance-of-learning-the-abcs-1.jpg 400 810 Stacey Maaser https://embracing-motherhood.com/wp-content/uploads/2018/01/EM_Logo.png Stacey Maaser2016-08-04 08:50:192022-10-12 18:49:24The Importance of Learning the ABCs

Best Books for Babies

General, Reading, Teaching
My Favorite Books for Babies

These are the books we have loved reading with our four children when they were babies.

Read more
March 20, 2016/by Stacey Maaser
https://embracing-motherhood.com/wp-content/uploads/2016/03/best-baby-books.png 400 810 Stacey Maaser https://embracing-motherhood.com/wp-content/uploads/2018/01/EM_Logo.png Stacey Maaser2016-03-20 18:14:232020-10-29 08:31:45Best Books for Babies

How to Raise Children Who WANT to Read

General, Reading, Teaching
embracing motherhood how to raise children who want to read by surrounding them with books and cuddles

Teachers, librarians, parents, politicians…we’re all guilty of saying it. Our intentions are noble and so we say, “Read, read, read!” Or, “The more you read the better you’ll get!” But it’s not about setting a timer to read for 15 minutes every day, it’s not about filling up a monthly reading calendar to get a prize, and it’s not about reading because someone told you to. It’s about igniting a passion within your children for reading so that they will be inspired to read because of their own intrinsic motivation. It’s about getting them to choose reading on their own because it is something they want to do.

In order to build a positive relationship with reading, we need to create memories of reading that evoke emotions of love, joy, and happiness. By following these steps, you can ensure that your child will build a positive relationship with reading.

1. Start Young

As soon as they are old enough to hold their heads up, stick a book under them! I started doing this with my not even three month old, and I was flabbergasted when he started to smile and look at the book. I use the same two or three books when he does tummy time, and he loves it!

3 month old baby looks at a book while doing tummy time

3 Month Old Julian Looks at a Book

Babies are definitely ready for some real reading routines by six months old. (Check out my blog :How Children Really Learn to Read to see how you can teach your baby to read.) We have always enjoyed incorporating story time before bed at around this age. This is also when we really start talking about letters, watching word videos, playing with ABC toys, and sitting them on our laps for story time. (Check out my blog Oral Language Development…More Important Than You Think to learn about one of the biggest precursors to learning how to read and Tips, Tricks and Resources for Teaching the ABCs to learn about how to give your child the foundation of reading.)

2. Go to the Library

It is very interesting to me to watch other families at the library who don’t share the same love of reading as we do. They come into the library with a very specific agenda, they let their child check out two books, and then they are out of there as quick as can be. With us on the other hand, going to the library is a special event! We get comfortable and enjoy the library atmosphere by playing with the magnets, using the chalkboard, playing with blocks and puzzles, and snuggling up in the chairs to check out a few favorite books. (Our library is VERY small, but we still enjoy it to its fullest!) Meanwhile, I am combing through each aisle finding books that I know my children will love.

Ophelia Playing with Magnet Letters at Our Library

Ophelia Playing with Magnet Letters at Our Library

Elliot is Busy Searching for Books

Elliot is Busy Searching for Books

Ruby Reading at Our Library

Ruby Reading at Our Library

I like to find short books that will appeal to all the kids for bedtime reading, longer books to read while snuggled on the couch, and books for all levels and interests of the readers in our house. When my children are ready, I help guide them towards picking out their own books. I teach them how to look at the spine for the title, how to choose interesting books based on the cover, and how to flip through the pages to make sure it’s a “just right” book. When our bags are full of the maximum number of books (35, but sometimes they let us go over), we check out. Also, I’m not afraid of a few late fines or lost or damaged books; it’s a small price to pay for such a wonderful service.

3. Build a Library of Books

Going to the library is fun in order to get some new books to read, but even better than that is having an eclectic collection of books at home that you can read over and over again. Sometimes it can seem overwhelming to start a home library, but you have to start somewhere! My favorite place to get books is at thrift stores and garage sales (that way you don’t have to worry if they get ripped, damaged, or torn…which they will). I love it when I can find garage sales where the people are transitioning away from younger children and are getting rid of everything in one massive dump. Getting piles of quality books for 10 cents each is the best, and I totally stock up! The collections you’ll find at thrift stores are more hit or miss. It definitely helps to have an agenda and know what you are looking for here, but sometimes you just want to add a little “bulk” to your library and this is a great place for that.

Once you know what kind of books really intrigue your children, you can start building Amazon wish lists for birthdays, Christmas, and anytime you have a few extra dollars. You can even buy used books on Amazon that are in pretty good shape. (Although I’d recommend staying away from the used books if they are the lift the flap kind, I haven’t had the best luck in this department.) For some book suggestions, check out my Amazon stores: Best Books for Babies, Best Books for Toddlers, and Best Books for Kids.

4. Make Books Accessible

Once you have books, you’ll want to make them easy to access! I love having books on bookshelves, but those are easier for storage and for adults to access. Kids like to see books displayed in a way that makes the books easy to see and easy to reach. My favorite method of storage is baskets. Here are the wicker baskets that I like to use. They are a nice way for me to keep the books organized with the covers facing out, and then I can strategically place them in places where the kids like to read. I love putting baskets next to little chairs and couches, near their little potty chairs, by their beds, and at little coffee table reading stations throughout the house. I’m pretty sure that every single room in our house has baskets and piles books!

I have also screwed gutters (found at Lowes or Home Depot) onto the walls to store books. They looked really cool, but didn’t get used as much as I thought they would. Plus, the kids would sometimes pull or hang on them and they weren’t super sturdy, but if put a tacking strip behind it and found some studs, it would probably hold up really well!

Using Gutters as a Bookshelf

Using Gutters as a Bookshelf

gutters as a bookshelf

3 Year Old Elliot Loves His New Bookshelf

There are also some cool book storage racks that display the book covers all facing forward. I liked having things like this in my classroom when I was a teacher. You’ll have to find the perfect way to make your books accessible based on the needs of your children and the design of your home.

5. Make Reading Time Special

During the day, we love snuggling up on our big soft couch to read piles of books. I store new library books in our coffee table and I keep baskets of books nearby. But I will usually set up a little pile of their favorite books that I know they will want to read before I sit down. Then I track down their silkies, pacifiers, and anything else they like to snuggle up with. Sometimes I’ll grab some milk and cookies or some other tasty treats before we begin reading. Then, we all snuggle up close together and enjoy some fun cuddles and special reading time.

reading cuddled up with mommy and baby

Reading Time is Special

Before bed at night, we always read books in our oldest daughter’s room. We have a big full size mattress on the floor that is covered with blankets and stacked with pillows. There are baskets and piles of books strategically placed nearby and we all enjoy cuddling up at night while Daddy reads stories.

I have some old Christmas lights stapled near the ceiling that create a nice soft glow perfect for night time reading. After that, we read to our older children (or they read to us) while they are tucked into bed, and then we read to our littlest ones in rocking chairs before putting them to bed.

6. Carve Out Time for Reading

I am always ready to drop everything and read books when my children are ready, but I also like setting aside special reading time during the day. Either mid morning or after lunch are my favorite reading times. I like to read after my kids have eaten, had play time, and are changed, dressed, and ready for the day. We enjoy cuddling up for nice long reading time and it’s really fun. I know that our days can get busy, but I think that just like we make time for eating every day, we need to make time for reading every day too. If you always read books at bedtime, you’ll always have reading as at least the end part of your day. Reading before bed is one thing that we never ever skip. If we’re in a hurry, we have a basket of little mini books that we can read in a hurry, but we never skip reading time.

7. Pick Interesting Books

When you sit down to read with your children, start by reading the books you KNOW they will enjoy rather than introducing something new. After you’ve read a few favorite books and you’re in the rhythm of it, then you can introduce some new books.

Each of our children have been into different types of books at different ages and stages. Our babies have really liked Sandra Boynton, touch and feel, ABC, and lift the flap books. When both of our girls were younger, they REALLY liked Dora books, and our son has always enjoyed books about superheroes and anything funny or gross. Whenever we know that our children are really into a particular type of book, we look for it at thrift stores, garage sales, Amazon, and the library, and we keep those favorite books stocked nearby. These are the books they gravitate towards and start to read independently. The cutest thing is seeing our toddler picture read the books we have read over and over.

8. Have Fun With It

If you get books that you really enjoy and really truly have fun while you read, your little ones will be able to tell, and it will make it a fun experience for them too. When I was taking classes while in pursuit of my teaching degree, I had one class about teaching reading that really stuck with me. The teacher did something truly remarkable and seemingly unorthodox…she read to us! And she didn’t just read the words on the page, she made them come alive. It felt so strange to sit in a class with a bunch of young adults and have a children’s story read to us, but I felt myself getting lost in the story as she read using different voices for the different characters and read with lots of expression and passion. Ten years later, I still remember the first book she read to us. It was Buzzy the Bumblebee. I bought that book, a nice hard cover copy, and thoroughly enjoyed reading it to my class and then later to my children. Because I love it and read with lots of expression, they love it too.

9. Involve Your Children

Children love to be involved in reading. Before we start reading a book, I like to spend a minute looking at the cover. We read the title, look at the cover illustration, and make predictions about what we think the book will be about or what will happen in the book. As we are reading, I like to involve the children in little ways by having them help me turn the pages, lift any flaps, or point out simple things that they notice in the pictures. For more of a challenge, I ask the them open ended questions about what they think will happen next, why they think a certain event happened, how they think the character is feeling, or if the story reminds them of anything that has ever happened in their lives.

I also like to involve my children by getting them to read parts of the text whenever I can. One of my favorite ways to get them to do this is with books that we’ve read over and over. I pause at certain words I think that they’ll know or at the last word in the sentence (especially if there is a rhyming pattern) and let them fill in the blank. This is a gradual release to the time when they will be reading independently.

10. Be Silly

Most of the time, we read the books as they are written, but sometimes, it’s fun to make the book silly. We do this by making up words to make the story silly. Potty humor always gets a big laugh (Poophead!) and so does saying the opposite word that will give the meaning a silly twist. We also like making songs out of some of our favorite books and using silly funny voices. Our kids beg Daddy to read books the “funny way” especially when it’s bedtime; using humor is a great way to get through any tired fussy moments.

11. Don’t Force It

The worst thing you could do is treat reading like a mandatory time of the day that you must “get through” in order to reap the benefits of the results. If you’re not feeling it one day, skip the reading. If you’re skipping the reading every day, figure out what needs to change in order to make it a fun part of your routine. Are you feeling uncomfortable and unsure of your reading abilities? Don’t worry! Your children won’t judge you, and the more you do it, the more comfortable it will feel. Are you having a tough time getting your children to sit still long enough for story time? This happens with my rambunctious son from time to time, and so I have found that he LOVES it when I read books with interesting figures like these Basher Books and make them “come to life”. I kind of skim and scan the book and make the characters talk to him and he interacts with them. This even carries over into his imaginative play. Do whatever works for you!

In Conclusion

If you make reading a priority in your life, and if you make it fun, your children will grow up having a love of reading that will last a lifetime. I think it’s also really important for kids to see that you enjoy reading as well. My husband really enjoys fiction and he’s always introducing our kids to his favorite books. Right now he is listening to The Lion, The Witch, and the Wardrobe with our oldest daughter on their way to school every morning.

I personally like reading nonfiction and doing research for my blog, and I love sharing what I am learning with our kids. Reading is an amazing and wonderful skill, past time, and family event. If you help teach children how to read (Check out my blog: How Children Really Learn to Read) and show them how fun it can be, you will be amazed to see what they choose to do with their love of reading as they grow. One of my favorite things in the world is seeing our children choose to read on their own. When you see this happen, you know you have succeeded!

3 year old reading to himself

Elliot Loves to Read

Check out my blog Oral Language Development…More Important Than You Think to learn about one of the biggest precursors to learning how to read and Tips, Tricks and Resources for Teaching the ABCs to learn about how to give your child the foundation of reading.

September 20, 2015/by Stacey Maaser
https://embracing-motherhood.com/wp-content/uploads/2015/03/embracing-motherhood.com-4.png 400 810 Stacey Maaser https://embracing-motherhood.com/wp-content/uploads/2018/01/EM_Logo.png Stacey Maaser2015-09-20 06:49:302020-11-20 15:54:20How to Raise Children Who WANT to Read

Popsicle Puppets for Pre-Reading and Imaginative Play

General, Reading, Teaching
Embracing Motherhood How to Make Popsicle Puppets for Oral Language Development, Reading Readiness, and Creative Play

I love making simple popsicle stick puppets for my young children because it is a great way to encourage imaginative play while also teaching basic reading skills. I love following their interests to make popsicle puppets of their favorite characters or genres and watch as their imaginations take off into a world of wonderment.

Pretend play is more than just fun for kids, it actually helps their cognitive development on several levels. Studies show that pretend play during early development allows for the enhancement of the child’s capacity for cognitive flexibility and creativity. Taking on different roles during pretend play also allows children to represent problems and scenarios from a variety or perspectives and this precipitates empathy and self regulation. Studies also show that it positively influences  language usage including subjunctives, future tenses, and adjectives. I love it because it get kids talking and any kind of talking is good for oral language development.

Materials

  • Jumbo Popsicle Sticks (Or you can just cut some strips of cardboard.)
  • Glue Stick (I like to buy my glue sticks in bulk here.)
  • Card Stock (You could also use regular computer paper.)
  • Scissors (I like these.)
  • Color Printer (Having a good economical printer is an absolute must! These ink cartridges, that go with the printer previously linked, are expensive, but they last a long time, like 1,200 color sheets.)
  • *Optional: laminator, laminating sheets, and large cardboard boxes

Directions

  1. Print out some small characters. Elliot really wanted germs this time around, and we found tons of great images on our google image search. He has also liked superheroes, spiders, monsters, and Star Wars characters. When I’ve made these for Ruby, she wanted all of the My Little Pony characters. To get the images, I first do a google image search, then I click on the image I want, right click and copy it, open a Word or Publisher document, right click and paste it in, and then resize it to fit my paper. Sometimes I add boxes with the characters’ names and other times I just write the name on the popsicle stick. This kids love sitting on my lap as we do this part together.
    Embracing Motherhood Germ Printouts on Popsicle Sticks

    Germ Printouts on Popsicle Sticks

    my little ponies

    My Little Pony Sticks

    superhero popsicle sticks

    Superhero Sticks

  2. *Optional: Laminate your sheets before cutting them out. Here’s the laminator and laminating sheets that I use.
  3. Cut them out. Sometimes Ruby helps me with the cutting, but I usually just do this by myself.
  4. Use the glue stick to affix the cutouts to the top of the popsicle stick. *If you’ve laminated your characters, you might want to put some masking tape over the back of the stick to make sure it really holds.
  5. Give them names. Elliot LOVES coming up with funny names for his germs. He’ll make up names like “Mook” and “Funkoo” and it’s a great opportunity to teach him how to sound out and spell words. It then becomes a great reading activity as he reads his sticks. I like writing the names vertically on the stick. On the back of the stick, we write their nicknames.

    elliot with popsicle stick project

    Elliot (4) Naming his Germs

  6. *Optional: Make backgrounds. When I made Ruby’s My Little Pony sticks, I also did google image searches for the homes of each of the characters. I printed out one picture of the outside of their home and one picture of the inside and glued them onto a large unfolded cardboard box. Elliot wanted random backgrounds of haunted houses and cities. This is a great way for children to learn about setting (where a story takes place).
    Ruby's My Little Pony Boards

    Ruby’s My Little Pony Boards

    Elliot's Boards

    Elliot’s Background Boards

  7. Imagination Games: Now the children can use their popsicle characters in some imagination games. I love to play with them too and use funny voices for the different characters. Sometimes I like to introduce a problem scenario like one character is evil and trying to capture the others or one is sad and the others want to cheer him up, but they are usually pretty creative and independent with this part.
    ruby playing with her boards

    Ruby (5) Playing with her My Little Ponies

    ophelia playing with popsicle sticks

    Ophelia (2) Loves Playing with Them Too

  8. Storage: I like to keep these out and accessible as the children are interested and want to use them, but if they lose interest after awhile, I tuck them away in a more disclosed location. That way, they’re excited when they “find” them again. 🙂

July 16, 2015/by Stacey Maaser
https://embracing-motherhood.com/wp-content/uploads/2015/07/popsicle-stick-project.png 400 810 Stacey Maaser https://embracing-motherhood.com/wp-content/uploads/2018/01/EM_Logo.png Stacey Maaser2015-07-16 14:46:082020-11-20 16:13:01Popsicle Puppets for Pre-Reading and Imaginative Play

How to Teach the ABCs with Magnet Letters

General, Reading, Teaching
Using Magnet Letters to Teach the ABCs

Teaching letter names and letter sounds is a crucial component of reading. When children learn the alphabet at a young age, it lays a strong foundation for learning how to read. I have four children five and under, and I have been blown away by their capabilities and desire to learn. As a former elementary school teacher with a Master’s degree in Language Acquisition, I have always been fascinated with teaching and learning, but it wasn’t until I became a parent that I realized the true potential of a child’s brain.

If I could recommend one thing for anyone with small children, it would be to focus on teaching the ABCs. In my blog, Tips, Tricks, and Resources for Teaching the ABCs, I have outlined everything that I have done that has worked for me and my children (who are all very different). My oldest daughter Ruby is five and in kindergarten; she reads fluently at a 3rd grade level. My son Elliot is four, knows all of his letter names and sounds, and is reading basic words, phrases, and repetitive text. My daughter Ophelia is 21 months old and knows all of her letter names and sounds, can read memorized words and phrases, and is starting to sound out words. For more details on how children really learn to read (hint: it’s not about starting with phonics), check out my blog: How Children Really Learn to Read.

Using Letter Magnets to Teach the ABCs

We have had these LeapFrog Letter Magnets on our fridge for just about as long as we have had children. The style has changed a bit since our original purchase, but the concept is the same. Basically, each capital letter fits into the player and when pushed with say a little chant with the letter name and letter sound(s). There is also a little music button that will either play, “The Wheels on the Bus” or “The Alphabet Song”. There is also a volume control for loud or quiet play and an off switch (for when you just need a little peace and quiet).

The other magnet letters that I really like are these Melissa and Doug Wooden Magnet Alphabet letters. The bold colors and simple design are fun for kids and easy to use as a teaching tool.

LeapFrog Letter Magnets

There are many different ways to use these LeapFrog Letter Magnets. Sometimes I like to line all of the letters neatly up on the fridge in alphabetical order for my children to discover, but they never stay that way for long! My daughter Ophelia, who loves order and neatness, will play with each letter one at a time in a patient and intricate way. My son Elliot, on the other hand, who loves movement and chaos, will smush all of the letters together, build towers out of them, or personify them in some imaginative play.

Ophelia Plays Neatly with Magnet Letters

Ophelia Plays Neatly with Magnet Letters

Each method has merit and is a reflection of the inner workings of their minds. As their mother, I love being a quiet observer as I take note of their different methods of play and think about how I can support their different learning styles. Just having educational toys available and allowing children to play with them however they choose is a huge benefit. The next step is to reinforce their learning along the way by verbalizing what they are doing and repeating what they are saying. Then the real icing on the cake is figuring out how to challenge them to just go slightly above where they are with guidance. This is known in the educational world as working within their zone of proximal development and scaffolding them as they work towards the next level.

Elliot Smushes the Magnet Letters Around in Imaginative Play

Elliot Smushes the Magnet Letters Around in Imaginative Play

 Wooden Magnet Letters and Tins

One activity I love doing with the kids involves using the magnet letters and tins. This is a great way to stretch their knowledge of letter names and letter sounds to the next level. By turning these muffin tins upside down, they make great templates for sounding out CVC words (consonant-vowel-consonant) or four letter words as with Elliot’s tin on the left.

Elliot and Ophelia Play with Magnet Letters and Tins

Elliot and Ophelia Play with Magnet Letters and Tins

What I do is pick a simple word like cat, sun, or dog, and then show them how to sound out each letter /c/ /a/ /t/ by touching each letter and saying the sound. Then I show how I say all of the sounds together quickly to make the word cat. They’re not ready to practice this skill independently yet, but it’s good to keep introducing things to kids that are just barely out of their reach so that they can get used to it through lots and lots and lots of repetition and as much time as they need.

Independent Learning Station

Once we have played with something like these wooden magnet letters and tins together, I like setting it up at an independent learning station. While here, the kids can practice what we’ve done together at their own pace.

Ophelia is Playing with Magnetic Letters at an Independent Learning Station

Ophelia is Playing with Magnetic Letters at an Independent Learning Station

Ophelia Loves to Have Little Stations to Play At

Ophelia Loves to Have Little Stations to Play At

There is No “Right” or “Wrong” Way to Play

I love it when the kids using these learning manipulatives as toys in a fun and creative way that works for them. I spend time setting up these learning stations and enjoy watching the kids use them however they like. When Ophelia takes the letters out of one box and says their names as she puts them in another box, this is an excellent way for her to practice her letter naming fluency.

Ophelia Puts Magnetic Letters in a Box

Ophelia Puts Magnetic Letters in a Box

Lakeshore Learning Alphabet Letters

Lakeshore Learning Magnetic Letters

Lakeshore Learning Magnetic Letters

If you really want to take things to the next level, these Lakeshore Learning Magnetic Letters are a wonderful teaching tool or you could get these magnet letters from Amazon. If you have a child with a lot of patience, you can sit down side by side and build words together on magnetic white boards. This is something I used to love doing with my oldest daughter Ruby when she was younger.

Elliot and Ophelia Play with the Lakeshore Learning Magnetic Letters

Elliot and Ophelia Play with the Lakeshore Learning Magnetic Letters

In Conclusion

Magnetic letters can be a wonderful educational toy and teaching tool. By spending a little bit of time working on letters when your child is young, he or she will be much better prepared for preschool, kindergarten, reading, learning, and more. By making playtime fun and educational, children thrive as their brains are given permission to learn and grow at their own pace.

You might also like the following blogs:

  • Tips, Tricks, and Resources for Teaching the ABCs
  • How Children Really Learn to Read
  • How to Raise Children Who WANT to Read
  • How to Engage Your Baby with Reading
  • How to Create an Environment That Encourages Creativity, Imagination, and Learning
April 15, 2015/by Stacey Maaser
https://embracing-motherhood.com/wp-content/uploads/2015/04/embracing-motherhood.com-19.png 400 810 Stacey Maaser https://embracing-motherhood.com/wp-content/uploads/2018/01/EM_Logo.png Stacey Maaser2015-04-15 09:08:082020-11-24 13:17:11How to Teach the ABCs with Magnet Letters

Search

Stacey Maaser

Stacey Maaser author of Embracing Motherhood

Author of Embracing Motherhood

Affiliate Links

I participate in the Amazon Services LLC Associates Program, which is an affiliate advertising program. As an Amazon Associate I earn from qualifying purchases.

Recent Posts

  • Best Broccoli and Cheese Soup
  • Why Ages 0-3 are the MOST Crucial Years of Brain Development
  • Teach Your Toddler How to Read
  • Teach Your Baby How to Read
  • Free ABC Resources to Help You Teach Your Child to Read
  • Teach Your Child the Other Consonant Sounds with These Free Resources
  • We Use Our Trampoline Just About Every Day!
  • How to Start a Homeschool Routine During Covid-19
  • 26 Learning Centers for a Homeschool Preschool Environment
  • How to Make Whole Wheat Sourdough Muffins

Hi, I’m Stacey Maaser,

author of Embracing Motherhood! I am a stay at home mother of 5 with 7 years of teaching experience and a Master’s degree in Curriculum and Instruction. I am passionate about teaching my children, feeding them healthy food, learning the truth about things (not just what is popular opinion or counter culture), and sharing what I’ve learned and experienced with others. Thanks for stopping by!

About Me
About Embracing Motherhood

Newsletter Signup

HOME     BLOGS    RESOURCE GUIDE    YOUTUBE    TPT    ETSY

The information on this website has not been evaluated by the FDA and is not intended to diagnose, treat, prevent, or cure any disease. By accessing or using this website, you agree to abide by the Terms of Service, Full Disclaimer, Privacy Policy, Affiliate Disclosure, and Comment Policy. Content may not be reproduced in any form.

Terms of Service | Full Disclaimer | Affiliate Disclosure | Comment Policy | Privacy Policy

Copyright © 2025 Embracing Motherhood. All rights reserved. Site by CurlyHost.
  • Facebook
  • Instagram
  • Youtube
  • Pinterest
Scroll to top
 

Loading Comments...