
Oral language development is one of the most important aspects of a developing young child’s brain and is what lays the foundation for learning how to read.
According to SEDL’s Reading Resources, oral language development is “highly correlated with later reading proficiency”. The research also shows that,
“Most language development occurs indirectly through language exposure rather than through explicit instruction,”
This means that as parents, we don’t need to teach our babies and toddlers specifically targeted language lessons, we just need to give them lots of exposure to quality language experiences. But what are quality language experiences? Does this simply meaning talking more or leaving the TV on?
Children are not just passive receptors of their environment. They want to engage, they want to be stimulated, challenged, and acknowledged every step of the way. Many people look at children as though they are not ready to learn until they are much older, but that couldn’t be further from the truth. They are ready to learn from birth, but it’s all about meeting them where they are and providing the language experiences that best fit their stage of language development. (For resources to help build your child’s vocabulary, check out my store.)
Stages of Language Development
First, let’s take a look at the stages of language development to see what is appropriate at each age level. Children may not fit into these categories perfectly, but it gives you an idea of how the focus changes from learning how to make sounds to asking questions.
Newborns (0-3 months)
During this “4th trimester”, a child’s brain is finishing the growth that couldn’t happen in the womb. They need you close. They need to feel your heartbeat and drink in your scent.

Basking in the Glow of Newborn Julian
They need to look in your eyes and feel you smooth their head and coo to them that everything is going to be all right. They need to feel safe, comfortable, fed, and warm. This is the bonding time where it all begins and your heart will completely melt when you start to hear them coo their first sounds. They have a voice!
Infants (3-6 months)
It’s so amazing to see infants leave the newborn stage. The memory of birth is just starting to fade as you hold your child with wonder and fascination instead of just shock and awe. Their eyesight is just starting to become fully functional and they are now a bit more comfortable with this world outside the womb. They have been soaking up the sights and sounds around them and are now ready to start mimicking what they see and hear.

Bonding with 4 Month Old Elliot
They love to look at your mouth and it’s fun to make exaggerated sounds. You can enjoy having “conversations” by saying something sweet and then waiting for them to respond. If you wait, you’ll hear them try to coo and copy you. When they are done, say something sweet again and then pause to let them respond. It is the cutest darn thing ever. These baby conversations are very important in their language development.
Babies (6-12 months)
Just look at the diagram below to see the explosion of synaptic connections by 6 months! This is when babies’ brains are in an optimal place for learning.

The Cambridge Handbook of Infant Development Brain, Behavior, and Cultural Context , pp. 94 – 127, Publisher: Cambridge University Press, Print publication year: 2020
There is a big misconception that because babies cannot produce language at this point – that they aren’t ready for it, but they are! They are just in the listening and learning phase for a little while. Because myelination is just starting to form (the fatty sheath around the synaptic connections that helps the signals transfer faster) it takes lots and lots of repetition of the same thing in order to make this connection speedy. So pick things that are important to repeat.

Watching Your Baby Can Read with 7 Month Old Ophelia
This is when I like to start using my ABC, First Words, Colors, Shapes, and Numbers Flashcards and Videos, and reading familiar books over and over again. This is a very crucial window, don’t miss it!
Emerging Toddlers (12-18 month)
You will notice that they will now start to produce what you have been repetitiously teaching them. It will seem as if they just suddenly learned it, but really, it started building when they were 6 months old.
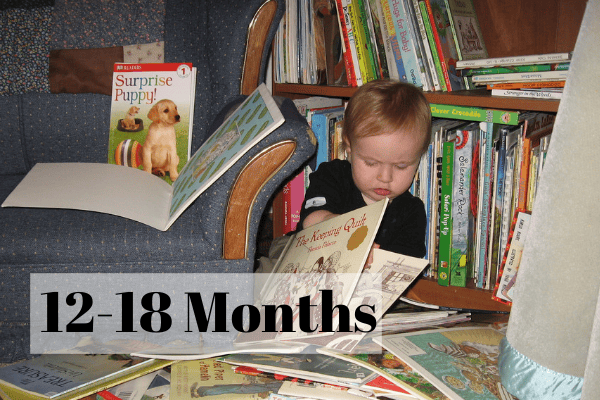
One Year Old Ruby Loves Reading Books
As their vocabularies start to explode, I’m often reminded of Helen Keller when she has that magical moment with her teacher Anne Sullivan and everything just clicks and she feverishly wants to know the names of everything. This is what it’s like at this stage. They understand that words have meaning and they want to know the names of things. So tell them! Tell them the names of every single thing their curious little minds want to discover.
Toddlers (18-24 months)
At this stage, they will actually be able to start communicating with you in ways that you can understand. They will start to use short phrases and they will be able to repeat simple nursery rhymes, songs, and chants.

19 Month Ophelia Loves to Learn
If you have been working on the ABCs and nursery rhymes all along, your heart will just melt when you hear them sing them. During this stage, I find it very helpful to repeat whatever they say to provide clarity. You’ll know when you get what they were trying to say right or wrong depending on their expressions.
Two Year Olds (24-36 months)
This stage is what some refer to as the “terrible twos” and I believe that this is because their brains comprehend and want to articulate way more than they are capable of expressing. You just need to help them find the words for what they are trying to say as they begin to assert their independence.

2 Year Old Ruby Learning About Her World
At this time, I like to use a lot of teaching tools to bring as many different modalities of learning together such as ABC fridge magnets, flashcards, and puzzles. Doing activities with your children and talking to them about what you are both doing is one of the best ways to facilitate language growth at this point.
Three Year Olds (36-48 months)
This is when children seem to take special interest in certain characters, topics, and toys. Use their interests to help them develop more specialized vocabularies based on whatever they are fascinated by.

3 Year Old Elliot Playing with his ABC Transformers
It could be anything from superheroes, to dinosaurs, to space exploration, to princesses. Help them to learn the specialized vocabulary that aligns with their interests as they continue to expand their vocabularies. This is they time I typically like introducing my Three Letter Word Families activities.
Four Year Olds (48-60 months)
At this age, any content that interests them can be used to teach vocabulary. They will be full of curiosities and questions and it is so very important that you don’t brush their questions aside, especially if it’s because you don’t know the answer. Show them what you do when you don’t know the answer to a question, like use google on your phone, look in a book, or ask an expert. It might be a good idea to have a real or electronic notepad to keep track of all of their questions. We enjoyed having a question wall for awhile because they were asking so many questions that I couldn’t keep up and I wanted to remember to get to them.

4 Year Old Ruby Exploring Her World Outdoors
I love this Einstein quote: “Make everything as simple as possible, but not simpler.” When children ask why the leaves change color, use words like photosynthesis, carbon dioxide, chlorophyll, and oxygen. Sometimes your explanations might be a little over their heads, but the more you talk about it and learn about it, the more it will make sense.
Synaptic Pruning
When children are between 3 and 4 years of age, a massive amount of synaptic pruning occurs. This is the brain’s way of tailoring its executive function to specialize in whatever environment the child is engaged with. This diagram shows how crucial it is to provide the child with the optimum environment at a young age to help lay the best foundation for brain development that will pave the way for all future learning.

Reproduced from Seeman et. al: Human Brain Dopamine Receptors in Children and Aging Adults, Synapse 1987: 1:399-404. Copyright ©1987, Wiley-Liss Inc., a division of John Wiley and Sons, Inc. Reprinted by permission of John Wiley and Sons, Inc.
Tips and Tricks for Optimal Oral Language Development
1. Vocabulary
Start by teaching your children the names of things. Everything in this world is new to them and the best place to start is to teach them what everything is called. Start with family members, things about them (body parts, clothes, etc.), and things in your house, then move on to things in the outside world.
When you’re changing diapers, talk about the clothes you are putting on them, when you’re eating, point out the foods that are in front of them, when they are playing with toys (especially educational toys such as alphabet blocks and shape sorters), talk about what they are and what color they are, and how you are using them. The best way to teach vocabulary is in the moment, so be there in the moment to teach your children the names of things when they want to know what they are.
2. Monitor Your Speech
Speak clearly, speak slowly, and carefully enunciate your words to ensure that you are understood. Get down to their level, make eye contact, and really talk to them. Especially after babies are 6 months old and older, you want to avoid the goo-goo-ga-ga baby talk. You’re not going to talk to them like you’d talk to another adult, but you don’t need to use a made up language with poorly crafted words either.
The most important thing is to make sure you have their attention. When or if you lose it, just adjust your speech until you have it again. You might need to use a funny voice, really over enunciate what you are saying, or speak with fewer or simpler words, but just keep trying something until it clicks or wait until a better time.
3. Zone of Proximal Development
When teaching in the zone of proximal development, you don’t want the learning to be too easy or too challenging. You want it to be just challenging enough so that’s it’s one level above where they are. Scaffolding occurs when you guide them to do something they couldn’t do on their own and then you take the scaffolding away when they can do it independently.
So if children are speaking just one or two words at a time, you’ll want to start modeling more complex sentences and phrases that are just slightly more complex than what they are saying. For example, if they point to your cat and say, “Kitty.” You can repeat what they say and add onto it saying, “Yes, that’s a kitty. A kitty says meow. Do you want to pet the kitty?”
You wouldn’t want to say, “Yes, that’s our cat Ferguson, and he’s 14 years old. He’s diabetic and in the beginning stages of feline leukemia so we will just let him continue sleeping.” This is so over their heads, that they will lose interest and no learning will take place. And if you just repeat “Kitty”, you’re keeping it too easy and not providing them with enough of a challenge.
4. Get Down on the Floor and Play
Get down on the floor to play with your children and talk about what you are doing. For example you might say, “Do you see the blue ball? Can you roll it to me? Good job! You found the blue ball! Now I’m going to roll it to you. Ready, set, go! Good job! You caught it!”

Ophelia and Julian Playing with Stacking Cups
This is one of the most simple things you can do and it’s a fun bonding experience as well. By getting down on the floor with them you are entering their world in a way that helps you to help them navigate it. The worst thing you can do is to talk down to your children when you’re not at their level and expect that they will understand you. The distance from your towering voice and their little world down below is a gap easily bridged by a little crouch. And hey, it’s time you worked those quads anyways! Here’s a video of me and Ophelia playing on the floor in a great example of some oral language development play.
5. Talk About What You’re Doing
Wherever you are and whatever you are doing, just talk to them about everything and anything. Talk about what you’re doing as you get them dressed, buckled in the car, and on the drive to the grocery store. At the store, describe everything you see. Talk about the food you’re putting in the cart, point out the numbers on the aisles, and stop to look at the lobsters and the swimming fish. Anytime you do something, talk about it. These experiences are the best ways to build background knowledge and learn language.
6. Listen and Repeat
Encourage your children to talk about whatever they are doing. To get children to talk more, you can start by repeating the last thing they say and then pause. This encourages them to speak openly without you dictating what they say with overly specific prompts. If they don’t have much to say, you can prompt them with simple questions like, “What’s this? What color is it? How many ____ are there? Can you find the triangle?”
Pausing after a question is very important with children. During this “wait time”, they are processing the question and formulating a response. Far too often, we answer our own questions after we incorrectly assume that the child wasn’t capable of answering it, when the reality is just that he or she needed more time.
Here’s a video of Elliot talking to me while playing his Minecraft game. Notice how I just kind of rephrase what he says as a way to encourage him to keep saying more.
7. Nursery Rhymes, Songs, and Chants
Learning new things is all about memorization and memorization is all about associations. The more associations you have with something, the more embedded in your memory it will become. This is why the repetition of nursery rhymes, songs, and chants are so easily embedded into long term memory. The more children can memorize, the stronger the neural pathways in their brain will become, and the more they will be primed for learning how to read.
Nursery rhymes are a great place to start because really young children do not have a very long attention span and anything that engages them is a great place to begin. Nursery rhymes with hand motions like the Eensy Weensy Spider, I’m a Little Teapot, Ring Around the Rosy are a great combinations of simple repetitious chants with basic movements that help make memorization easier.
8. Read Books
Books, of course, are great ways to engage children with language and experiences that they might not otherwise be able to have. I love reading everything from word books, to magical fantasies, to books about favorite TV shows like Dora, to nonfiction books. Whatever is exciting to both you and them is a great place to start. Keep in mind that it’s not just about reading the books, it’s about engaging with them.

Ophelia Reading Dora Book
You can do this without reading a single word. Look at the pictures and talk about what you see. By encouraging this picture reading, you will familiarize your child with how to hold a book, how to turn the pages, and how to be a reader. Learn more about how to teach your child how to read in my blog: How to Teach Your Child to Read in 5 Simple Steps.
9. Share Your Questions and Passions
Share your curiosities and passions with your children and provide a model for what it means to be a life long learner. Show them that you value questioning by listening to them and honoring the importance of the questions they ask. Encourage them to ask why and answer their questions in detail. If you don’t know the answer, tell them so and then look up the answer together.
10. Favorite Things Books
When they are ready, make favorite things books. Print out pictures of their favorite things or print out pictures of them doing things. Then, look through it together and write down what they say next to each picture.

Favorite Things Books with Comb Binder

A Look Inside Favorite Things Books
I love having a little pile of blank books laying around and letting the children decide how they want to use them. Sometimes we write stories, sometimes we make books about whatever they’re passionate about, sometimes we make ABC books, and sometimes we make books about the things we’re learning about.
In Conclusion
If you spend a lot of quality time with your children, then oral language development should happen without giving it a second thought. Oral language is the foundation for all further learning by providing background knowledge. The earlier children’s brains can be stimulated, the more connections they will have in their brains and the stronger they will be. So get down on the floor and play with your child, talk with your child, and listen, really listen every chance you get.
For More Information
You’ll find everything you need to teach your child to read at my teachers pay teachers store which includes flashcards, videos, posters, and more.
How to Teach Your Child to Read in 5 Simple Steps (Keeping it Simple)
- Language Rich Environment: Use oral language at the child’s level (Get down on the floor and play together!) and help them memorize vocabulary words. (Tell them the names of things!)
- Phonemic Awareness: Teach one sound for each letter of the alphabet. (Start with short vowels.)
- Phonics: Tap out sounds in three letter words to teach how sounds come together to make words.
- More Complex Phonemic Awareness: Introduce long vowels, digraphs, other vowel sounds, and complex consonants.
- Reading Comprehension Strategies: Use quality literature to interact with books and ask questions before, during, and after reading to make sure your child is understanding what is being read.
Teach Your Child to Read Blog Series (Digging Deeper)
- #1-Oral Language Development Lays the Foundation for Reading
- #2-How Engage Your Baby or Young Child with Reading
- #3-Learning How to Read Begins with the ABCs
- #4-Memorizing Words (Before Sounding Them Out) Leads to Reading
- #5-Building Vocabulary with Numbers, Colors, and Shapes
- #6-Teaching Phonics with Three Letter Word Families
- #7-Unlock the Final Stages of Reading with Advanced Phonemic Awareness
- #8-Reading Comprehension Strategies Lead to Independent Readers
- #9-Reinforcing Reading with Writing


